
The Little Thing I Always Forget to Pack
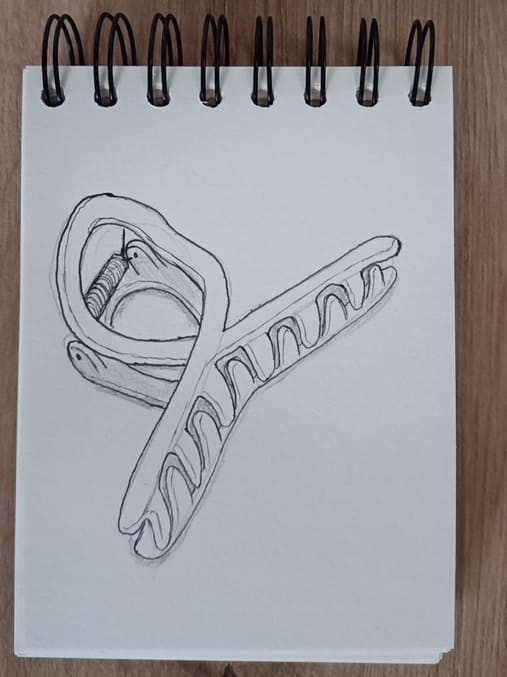
This week, we’re drawing a claw clip: summer’s tiny hair-saving hero, little teeth and all.

Difficulty: easy
Materials: pen and pencil
Monthly category: Travel Essentials
Inspired by: photo by Rylee Yi

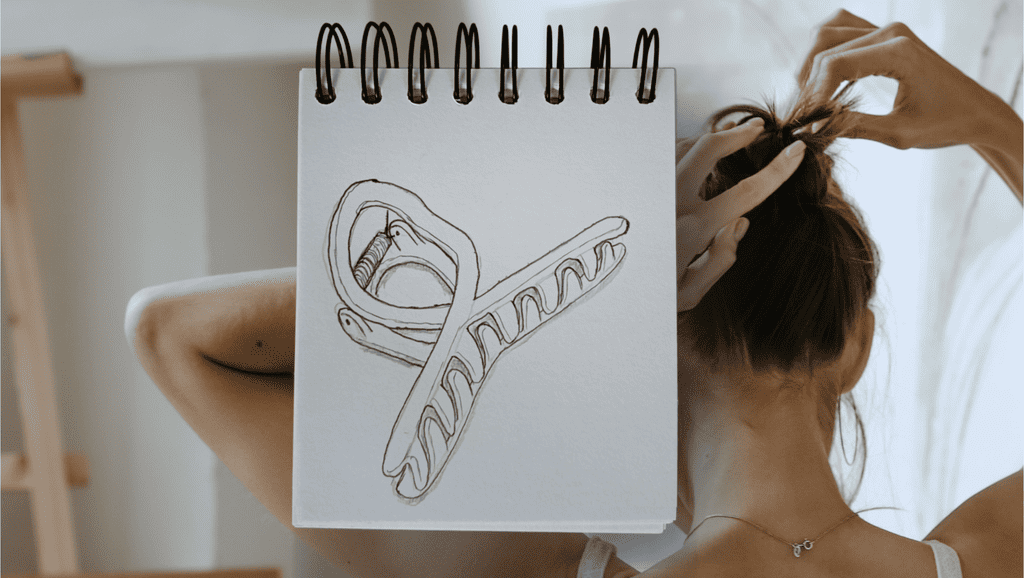
This week, we are drawing an object I personally forget most often when packing for a trip: a claw clip. Which is unfortunate, because five minutes into summer heat, it suddenly becomes the most important object in the world.
I love having one with me during summer trips, so I can put my hair up when it gets too hot and, as always, a hair tie is nowhere to be found.
Claw clips are simple little things and easy to draw. The little teeth may look tricky, but we will simplify them, so this is going to be a gentle one.
Play some relaxing music, settle into a quiet corner, and let’s draw.
Settle In and Draw
Step 1: First, let’s draw the biggest parts of the claw clip: the teeth area and one handle, the part you press.
For the teeth area, draw a very wide V, and then another one below it. The handle is just a circular shape near the base of the upper V.
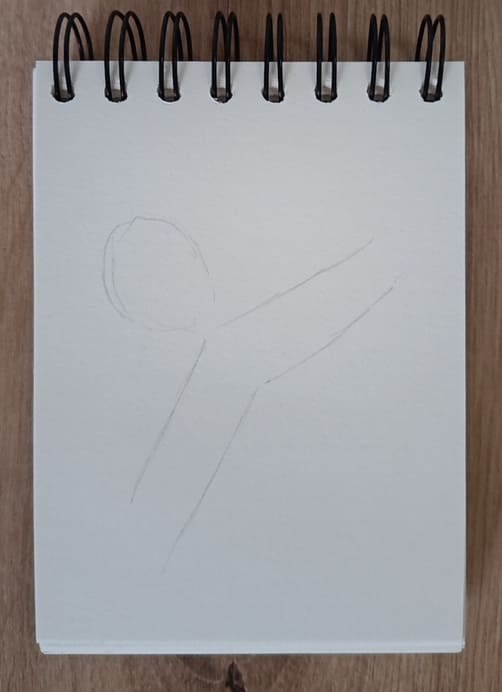
Step 2: The handle is not a perfect circle. It is bent and curved at the top, so let’s make its final shape with one wobbly line. Then double that line to create the body of the handle.
Do the same with the top line of the claw body, which is the upper line of the teeth area.
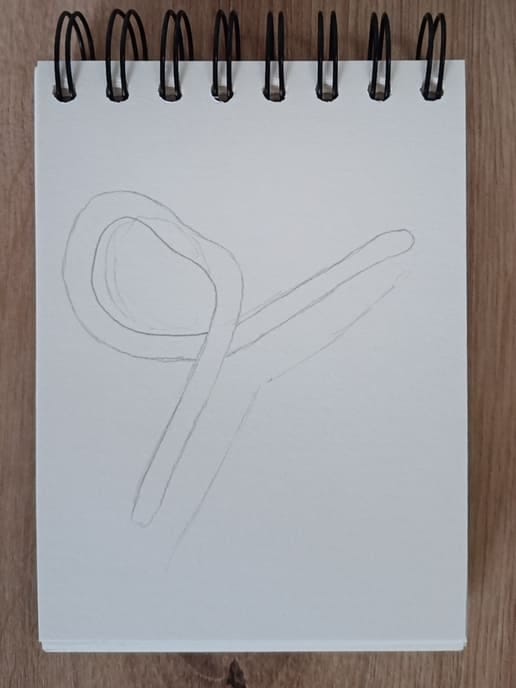
Step 3: Let’s tackle the teeth now. Draw vertical lines to fill the entire teeth area. The space between two lines will become one tooth, so keep the lines spaced out and as even as you can.
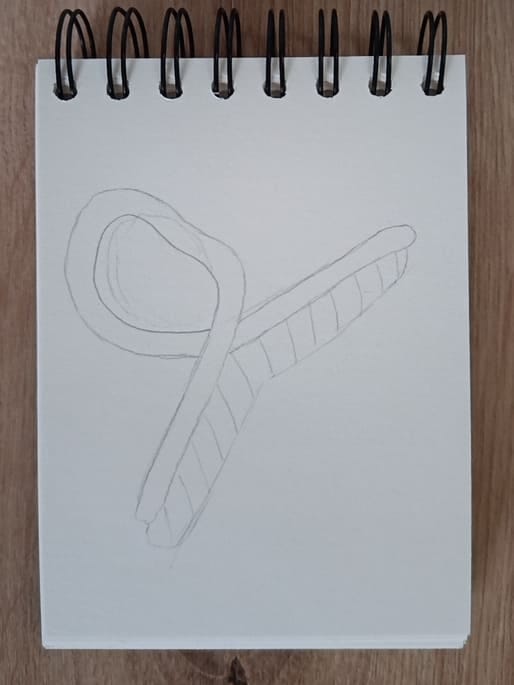
Step 4: Add the bottom handle. Simply draw two circles behind the top handle.
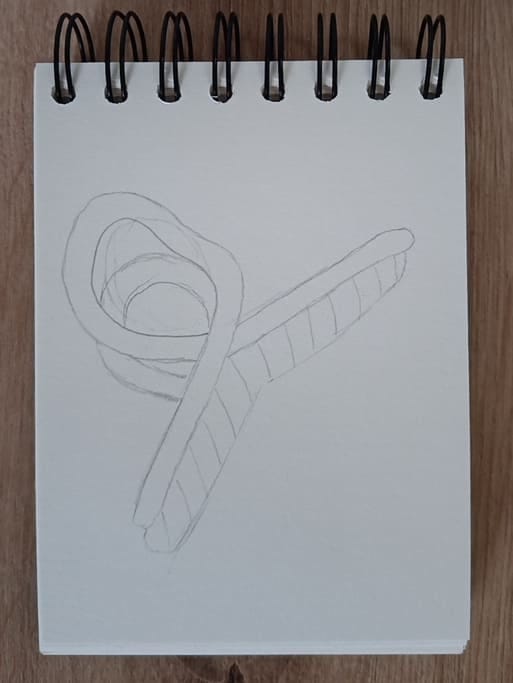
Step 5: Now let’s connect the handles. We need to add the metal spring and the parts that hold it.
First, let’s add the spring holders. Think of them like adding ears to a bear drawing. Only this time, the bear is our bottom handle. Add the ears as two upside-down U shapes. Make sure they touch the upper handle.
The spring is just a tube shape. Keep in mind that it should sit exactly between its two holders.
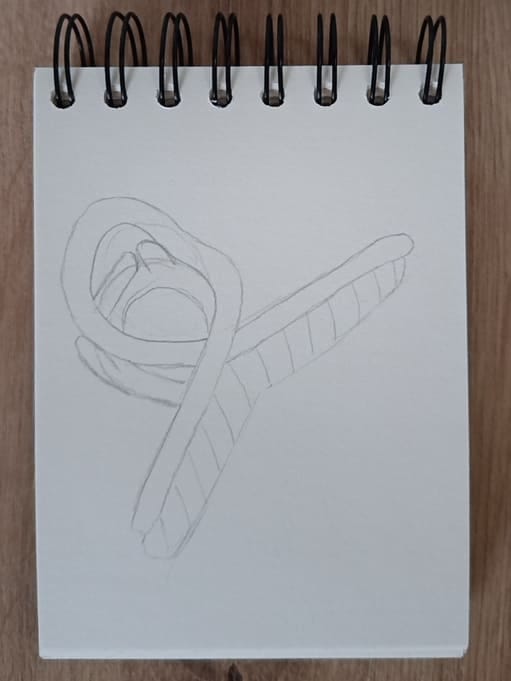
Step 6: Take your pen, and let’s trace what we have. Trace everything except the teeth area.
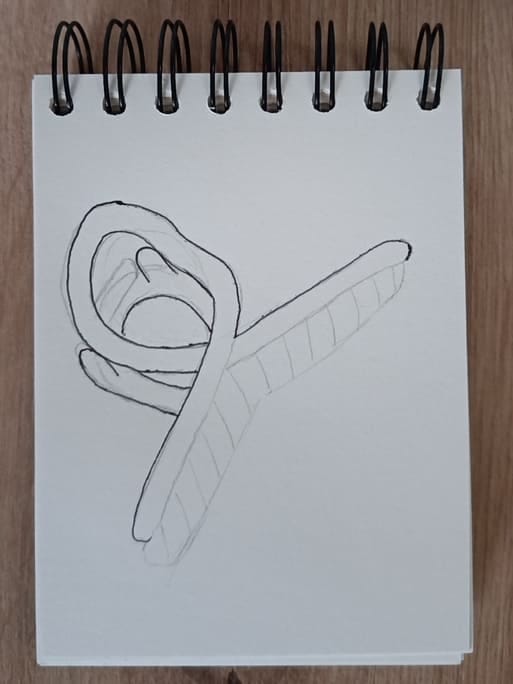
Step 7: Add half-circle lines to the spring to create its texture. Then add details to the spring holders. Add one line that follows the shape of each holder to make them look more 3D.
Add a dot in the middle of each holder for the pin that holds the spring. Add another line toward the top handle to suggest a second little pin mechanism.
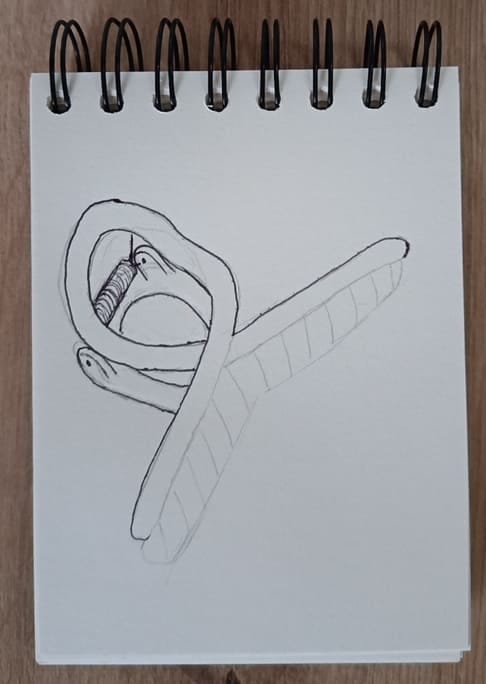
Step 8: To better show the shape of the claw body, let’s add some texture to it. Add light lines near the left edges of the handles.
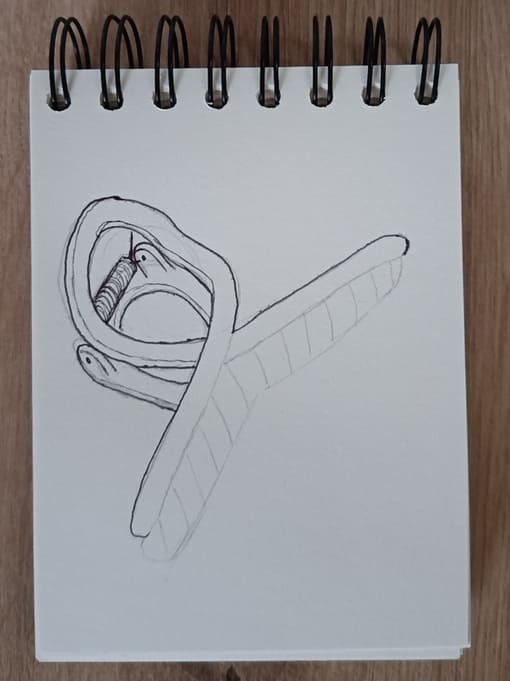
Step 9: Time for the teeth. We will draw them one by one. They are interlocked, with one coming from the top and the next one coming from the bottom. We need to keep that in mind so we do not mix the order.
We already have little spaces for each tooth. To draw them, we will make U shapes, slightly curved to the right. They should take up as much space as possible, but make sure they do not go outside their little spaces.
The first tooth comes from the top arm of the claw. The second one comes from the bottom, as an upside-down U shape. Then again from the top arm, and so on.
Take your time here. This part looks harder than it is.
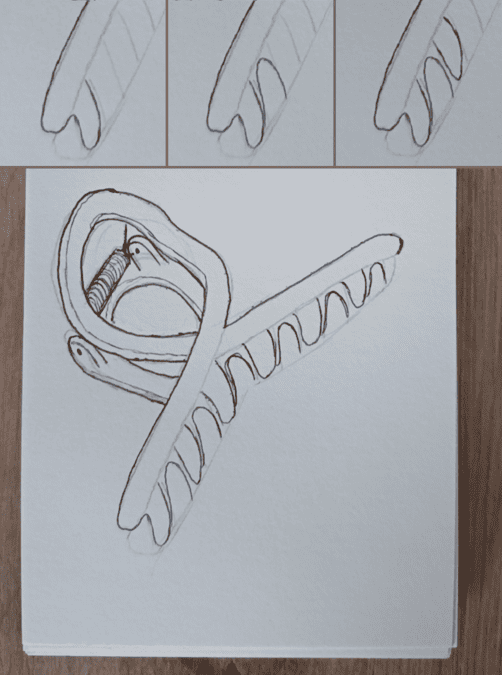
Step 10: Now let’s connect the teeth to the arms of the claw. First, add the line for the bottom arm. Make sure it does not touch any of the teeth. Then, above that, add a second line for the other side of the bottom arm. This one goes behind the teeth.
We already have a pencil line for the missing part of the top arm. Just trace over it, connecting it to each tooth attached to it.
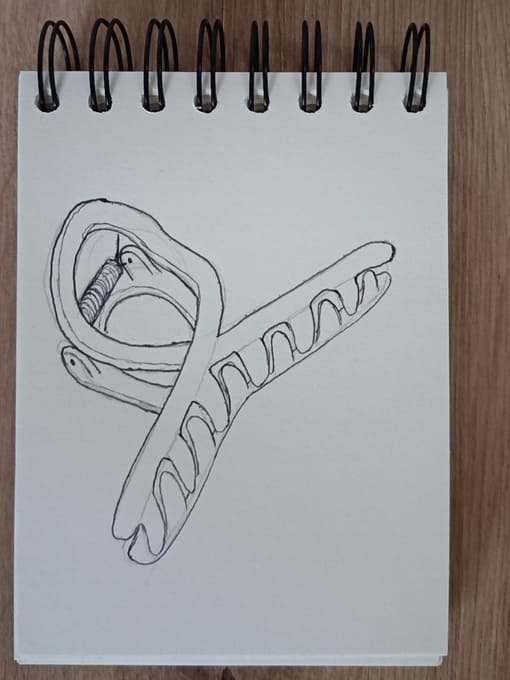
Step 11: Just like we added texture lines to the handles, we will add them to the teeth and arms. Add light lines to the left sides of the teeth.
If you have space, you can add one line near the bottom edge of the top arm. I didn’t add it to the bottom arm, because there was no space.
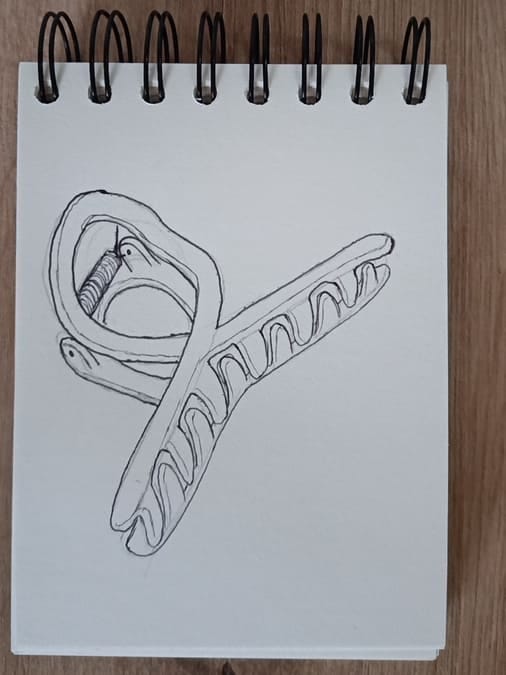
Step 12: Let’s add a bit of shading. Shade the empty spaces between the teeth, the parts that are not actually the claw. Then lightly shade the entire bottom handle.
Finally, shade the ground where the claw is touching it.
Gentle Tips for Easier Drawing
This drawing has a lot of repeated parts: teeth, arms, handles. That can have a relaxing effect: doing the same simple thing over and over. Let yourself slow down with it. One line, then another. Enjoy the process.
If you feel like sharing, send me your finished drawing. I would love to see it. You can reply to this letter, just like replying to any other email, or DM me on Instagram.
Stay mindful,
Yours in ink and paper