
Shuttlecock. Does It Ring a Bell?
This little thing has a name, and today we are drawing it.

Difficulty: medium
Materials: pen and pencil
Monthly category: Summer Goodies

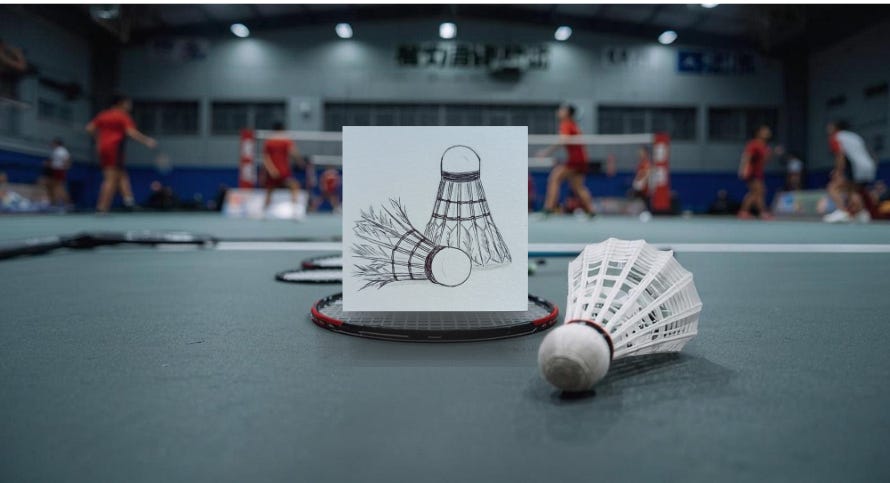
Badminton has always been one of those gentle summer games that my family and I could make as relaxed or as chaotic as we felt like. A few rackets, a little space, little to no wind, and this strange feathery thing flying through the air.
And that thing has a name: shuttlecock.
I don’t know about you, but this is exactly the kind of word I always almost remember. I know the object. I know the game. I can see it clearly. But the name? It takes a second.
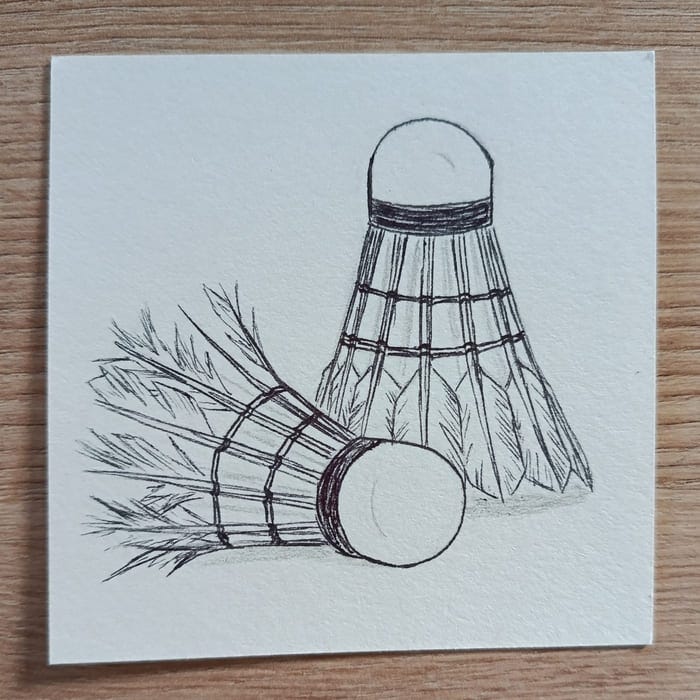
This week, we are giving the little badminton mystery its sketchbook moment. Let’s draw a shuttlecock. Actually, let’s draw two: one fresh and upright and a fallen one that has clearly seen a few games.
Settle In and Draw
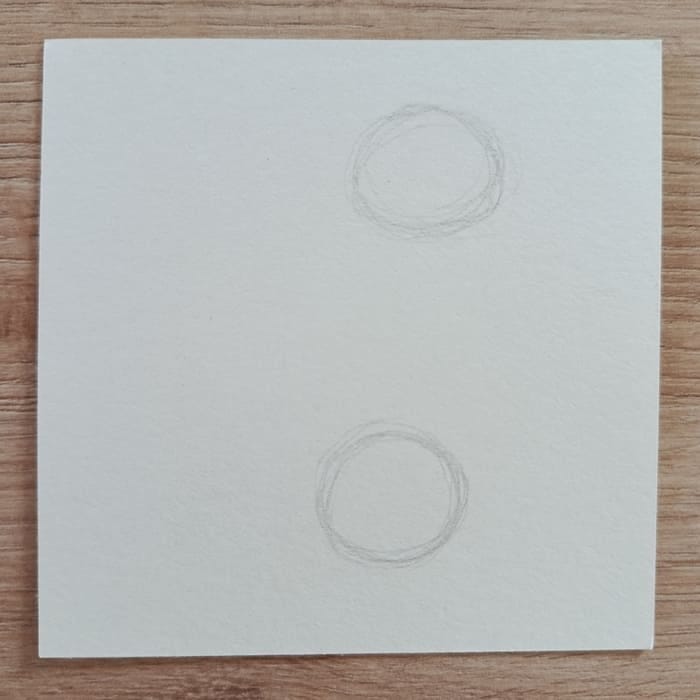
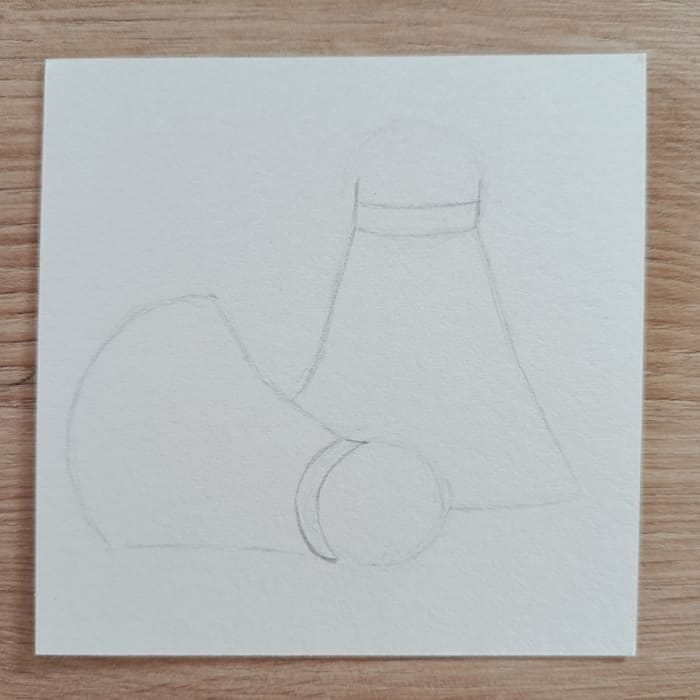
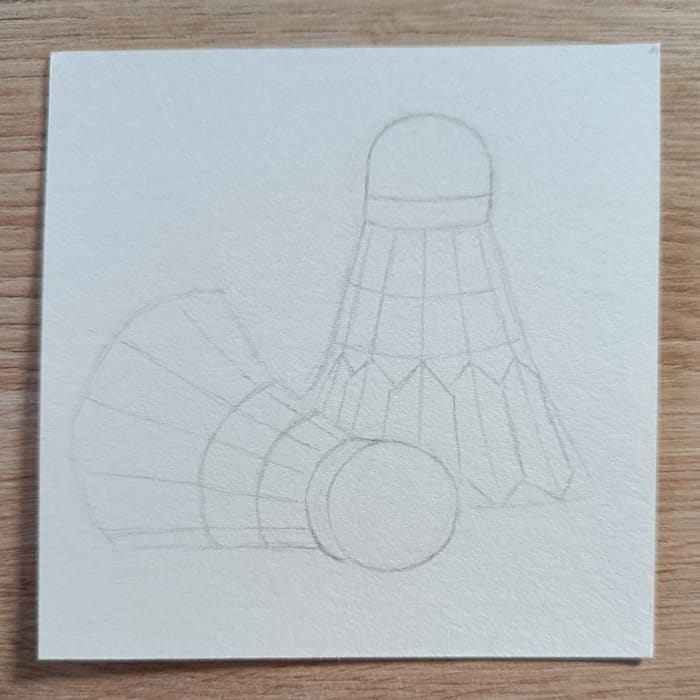
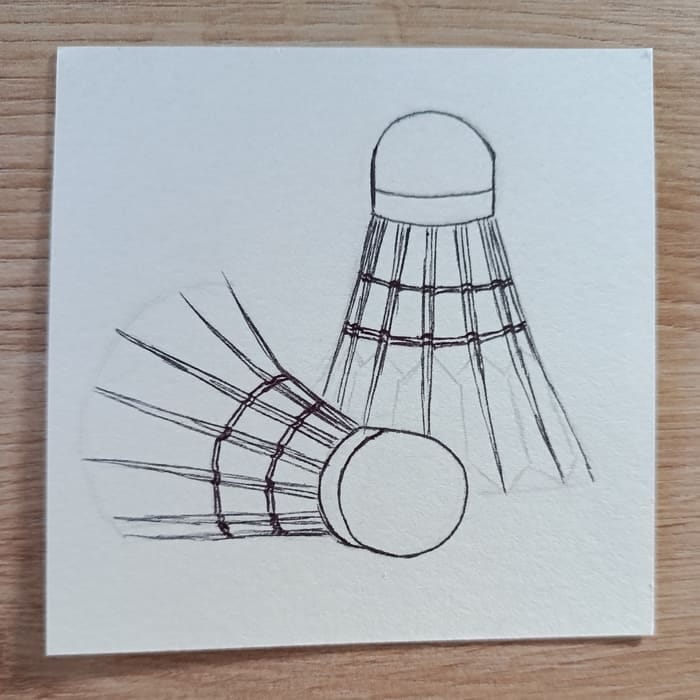
Step 1: First, draw two circles. One goes at the top right, and the other goes at the bottom, a bit to the left.
If you somehow draw perfect circles on the first try, wonderful. But if you are like the rest of us, build them slowly with a few light lines until the general shape looks like a circle.
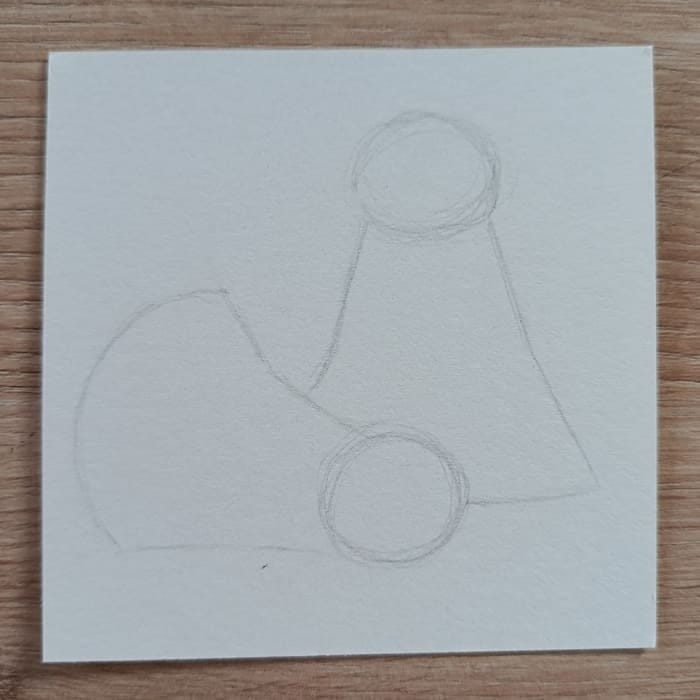
Step 2: Add the shapes for the skirts of our little feathery things. Notice how the lines go wider from the middle toward the end of the skirt.
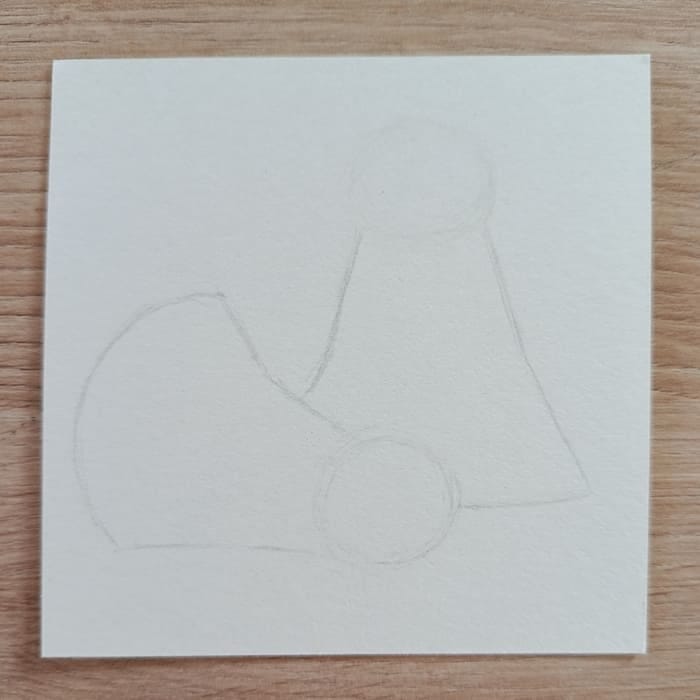
Step 3: If you drew two perfect circles, skip this step. If not, gently half-erase them. The idea is to erase enough so the lines we add over them will not be interrupted, but still keep enough of the original circle so it can guide you.
Step 4: At the base of the top shuttle, add the lines for the black band that connects the tip and the skirt. The horizontal lines should be slightly curved. Add two vertical lines to hold them together.
Add the same band to the lower shuttle. Make its lines more curved, following the edge of the half-erased circle.
Step 5: Trace a line over both half-erased circles.
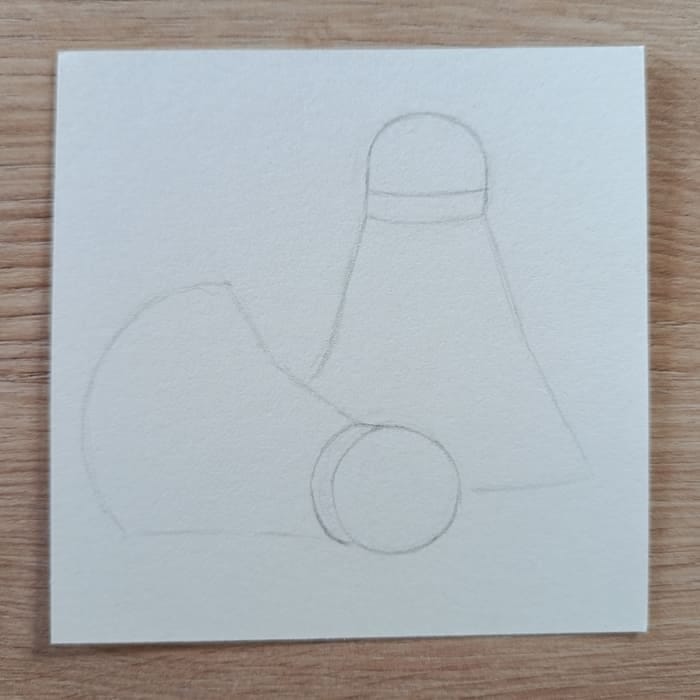
Step 6: Pause and check. The most important part of the drawing is done. Take a look and see if everything feels right. Do the angles look good? Is the tip the right size? Does the band below it follow the shape?
If everything looks good now, your final drawing will be good. If something is off, fix it now. It will be harder to fix later.
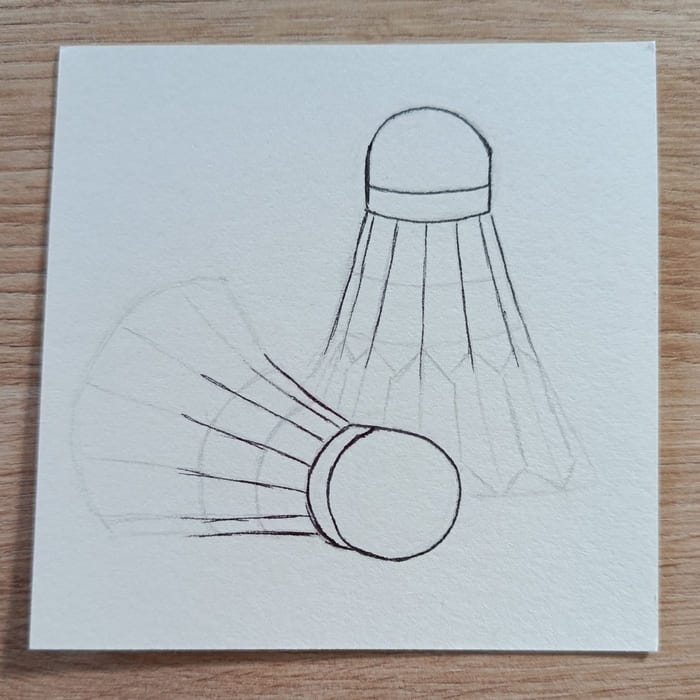
Step 7: Add one straight line in the center of each shuttle to represent the stem of a feather. Then add two curved lines in the top half of the skirt. These will become the thread bands that hold the feathers together. Make sure the ones on the bottom shuttle are more curved, especially near the edges.
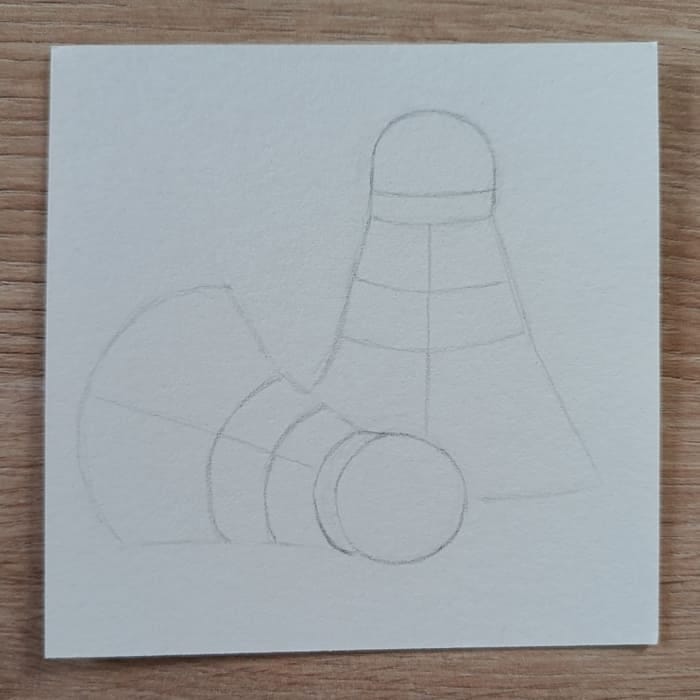
Step 8: Add lines for the rest of the feather stems. Make sure they follow the curve of the skirt, getting wider in the lower half. The last feather stem should be near the edge of the skirt.
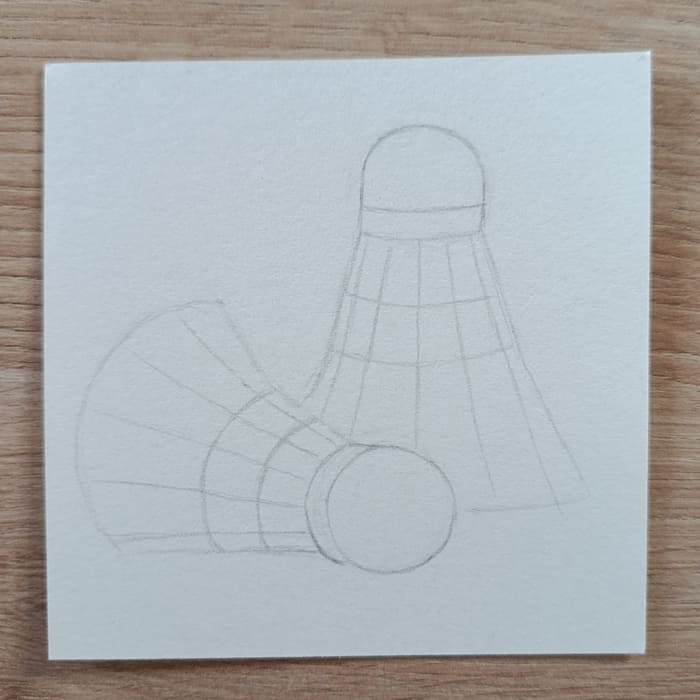
Step 9: Draw the basic shapes of the feathers on our new shuttle. They are overlapping, so decide which ones sit in front. No need to draw them on the fallen shuttle. That one is well-used, so it will not hold its form perfectly.
With this, our sketch is done. This is a good moment for a little break. Rest your eyes, shake out your hand, and come back when you feel ready. Then grab your pen, and let’s start the fun part.
Step 10: Trace the lines of the tip, the band, and the top of the feather stems.
Step 11: For each feather stem, add two more lines, one on each side of the line you already have. Make the new lines go all the way to the bottom. They do not need to be perfect. Draw them with multiple strokes.
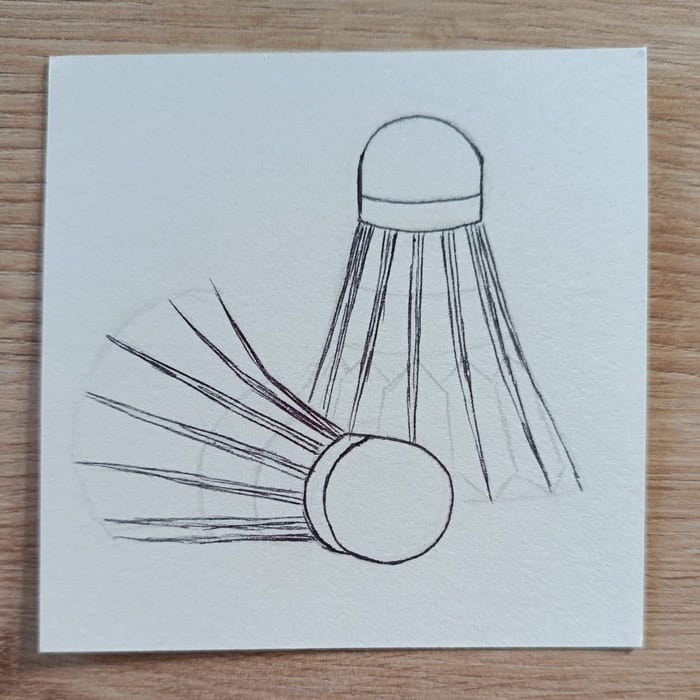
Step 12: Trace the line for the thread band. Make a small upward-facing semicircle whenever the thread line meets a feather stem. Then repeat by adding a second line just below it. This will make the thread band thicker.
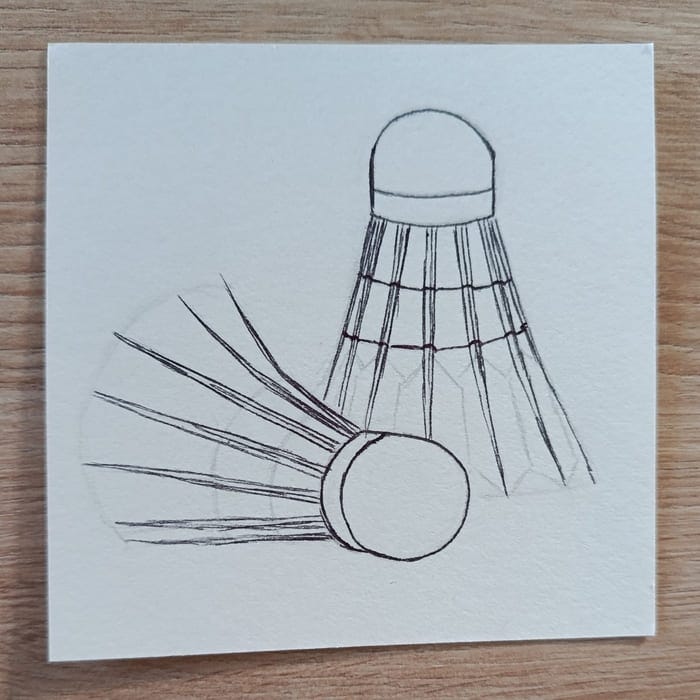
Step 13: Add the new feathers. Trace them lightly. Add a little split here and there for a bit of variety.
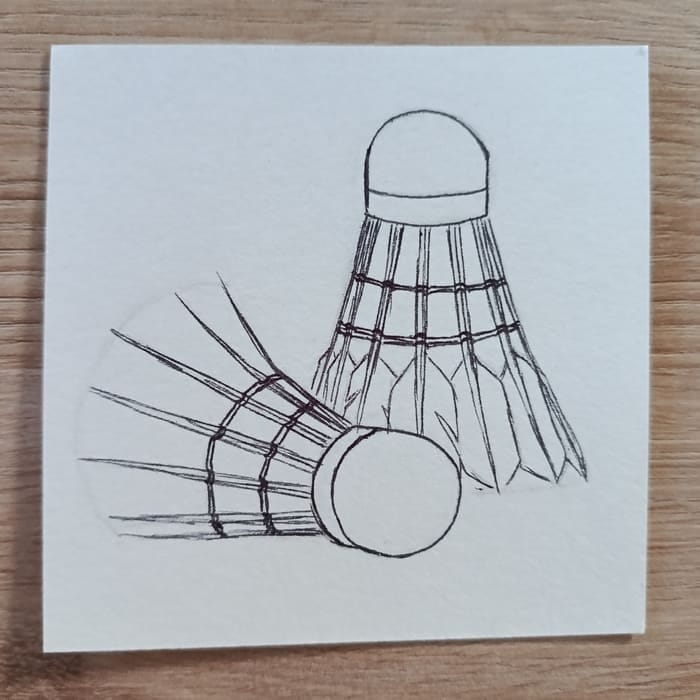
Step 14: Add the well-used feathers. They are mostly random lines. Leave one stem completely without feathers. Let another one have feathers only on one side.
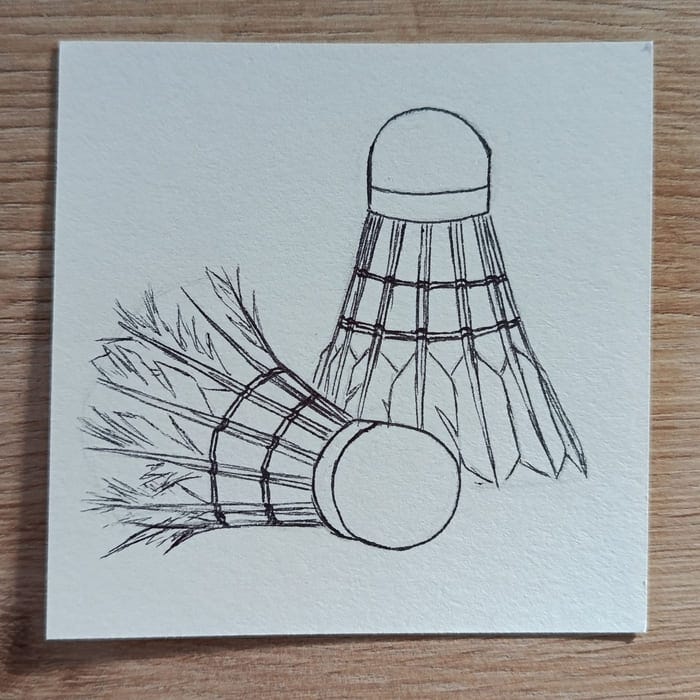
Step 15: Now we are adding details. Fill in the bands near the tips, but do not fill them perfectly.
Add light lines near the edges of the feathers. Draw them from the outside toward the stem. Keep them parallel.
Step 16: Final little touches. Erase the sketch line near the feather base of the fallen shuttle.
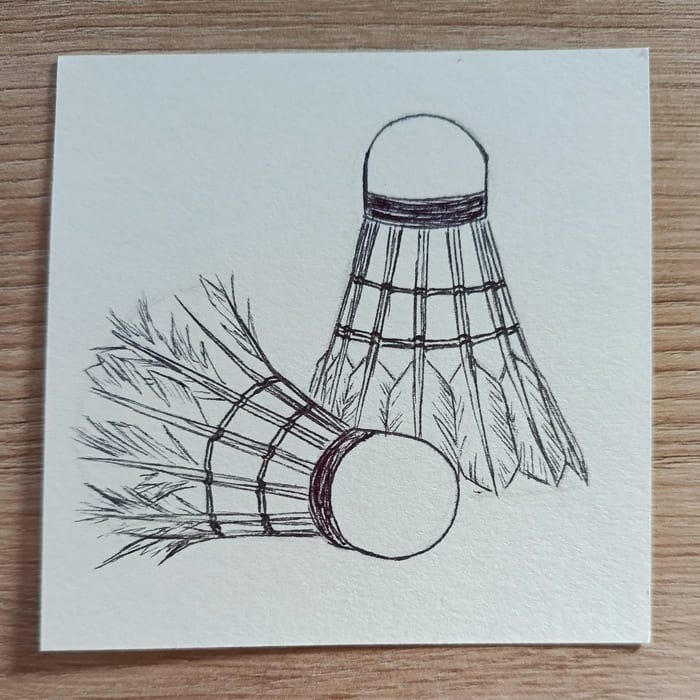
Take your pencil again and draw some light lines where the shuttles touch the ground. They will act as shadows.
Add a small line on each tip to show its shape better. Then add the feather stems that are on the other side of the shuttle. Draw them as simple, thicker lines between the pen stems.
Gentle Tips for Easier Drawing
This little drawing is a bit harder and has more steps, but the result is totally worth it. Once your sketch holds the structure of the shuttles well, you are 82.94% done.
If this drawing feels like too much today, you can draw just one shuttle. The new one is easier to draw, but the old one has more character. You can always add the other one later.
Did you find this one challenging? Are you proud of your result? Let me know.
If you feel like sharing, send me your finished drawing. I would love to celebrate your little accomplishment with you.
For the quiet pride of making something,
Yours in ink and paper