
Please Tell Me I Packed the Charger
A relatable little travel drawing for anyone who checks their bag one more time before leaving.

Difficulty: easy
Materials: pen and pencil
Monthly category: Travel Essentials

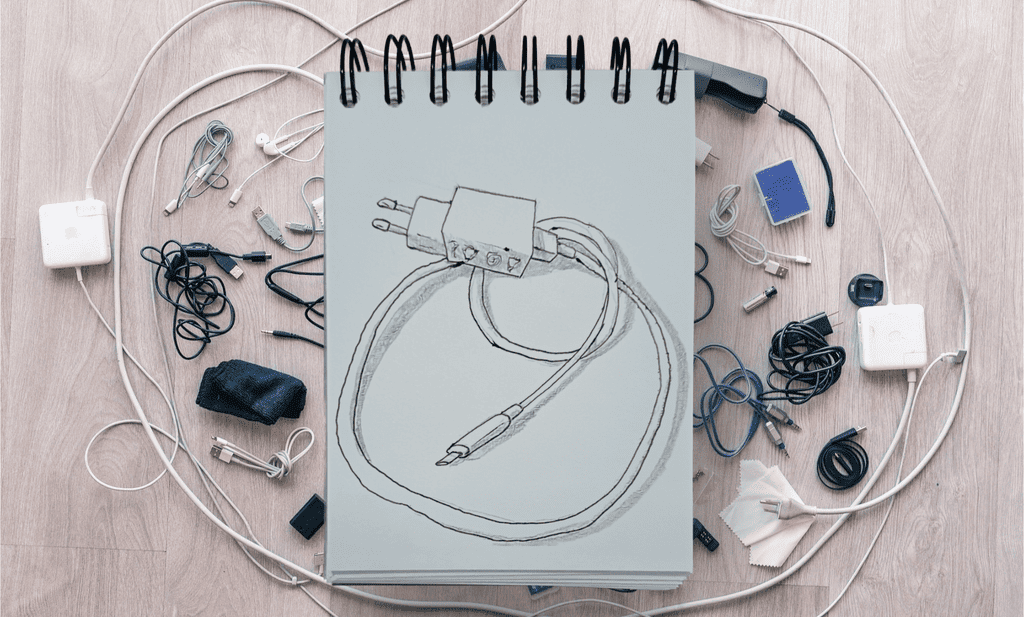
Today, we are drawing another thing we really should not forget when traveling: a phone charger. The longer the trip, the more things we pack that need charging: a phone, a laptop, headphones, another phone, a smartwatch, a camera, Bluetooth speakers. Then there is a power bank or two for charging on the go. Even cars have charging cables now.
To avoid overpacking, we are drawing just one. Small, useful, and very easy to lose. Let’s start.
Settle In and Draw
Step 1: This drawing is 30% charger block and 70% cable. First, let’s map that in. Draw a rectangle for the charger block and two circles below it for the cable loops.
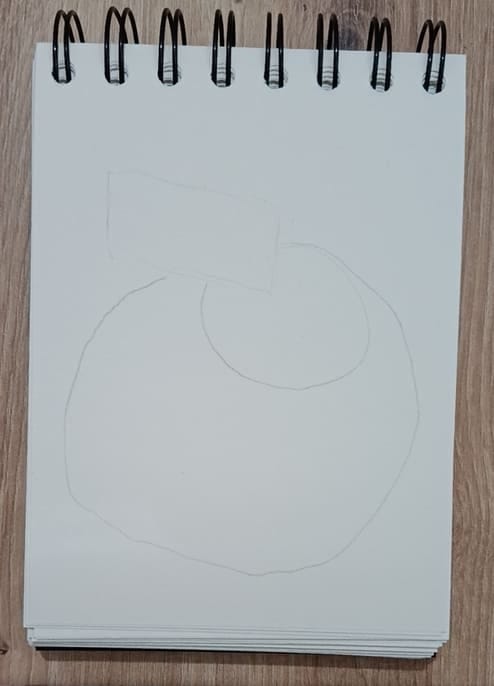
Step 2: Now let’s turn the rectangle into a charger block. It consists of one big rectangle and one smaller, flatter rectangle. We see only two sides of the larger rectangle, so draw the vertical lines curving outward.
The smaller one is simple to draw. Add two lines sticking out from it to represent the pins that go into the wall outlet.
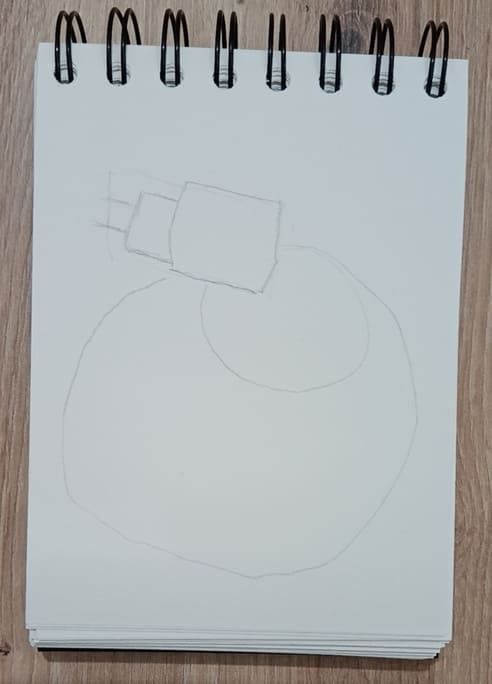
Step 3: Now, outside of the original rectangle we drew, let’s add the smaller part that connects to the cable. It looks like one small rectangle and an even smaller tube.
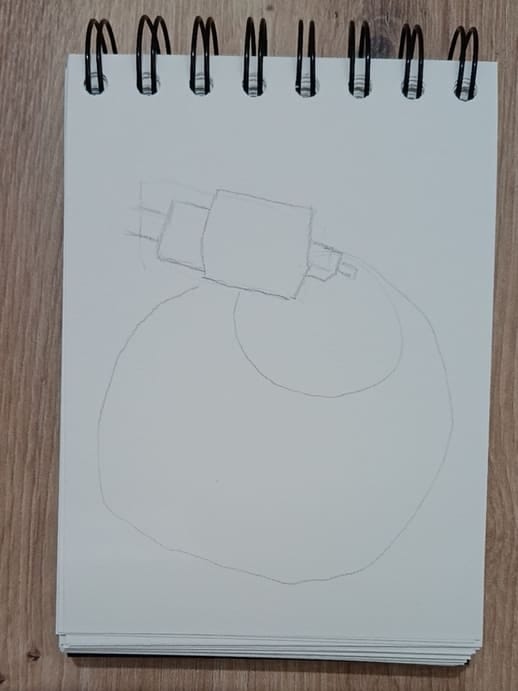
Step 4: Next is the connector, the part that connects to the phone. Place it somewhere in the middle between the two circles we drew for the cable. It looks like a flattened tube.
Then add another line for the part of the cable that goes from the connector toward the back of the charger block.
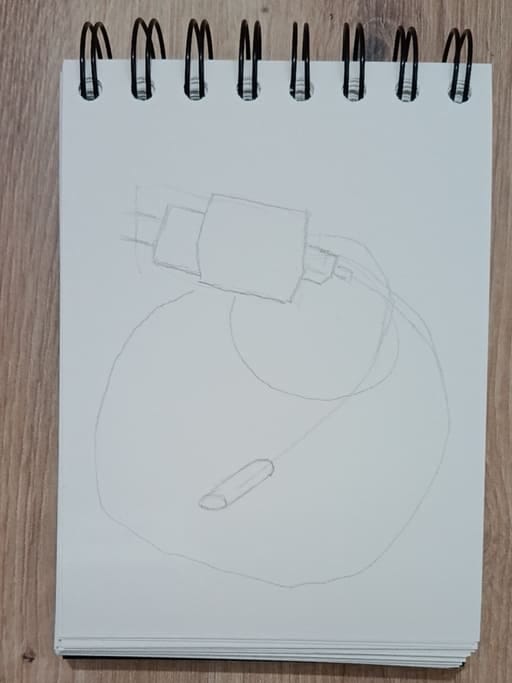
Step 5: To finish the connector, add a small rectangle at one end and a small tube at the other.
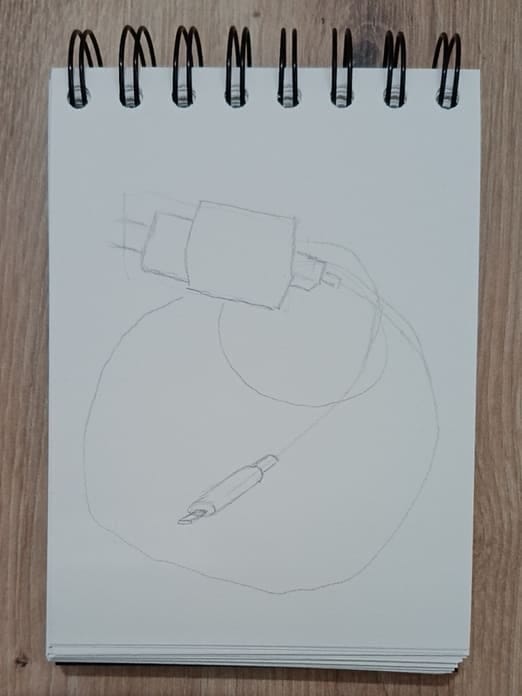
Step 6: Take your pen and trace the charger block. The two pins that go into the outlet have rounded tips. I also made the tips thicker than the rest of the pins, but that is optional. You can just draw the pins as straight tubes and then add a line that marks the tip.
Trace the connector as well.
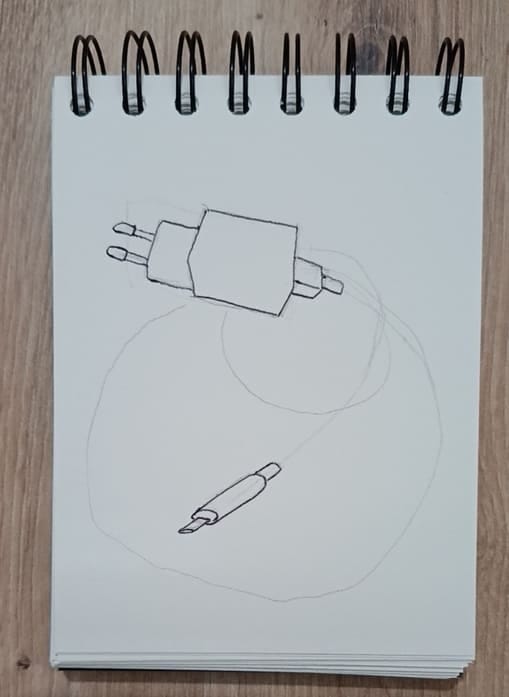
Step 7: Now we are turning the circles into cable. First, draw the part of the cable that starts at the connector. Draw it until it reaches the top part of the smaller circle.
Draw the smaller cable loop. Keep in mind that one part of it goes under, and one part goes over the cable starting at the connector.
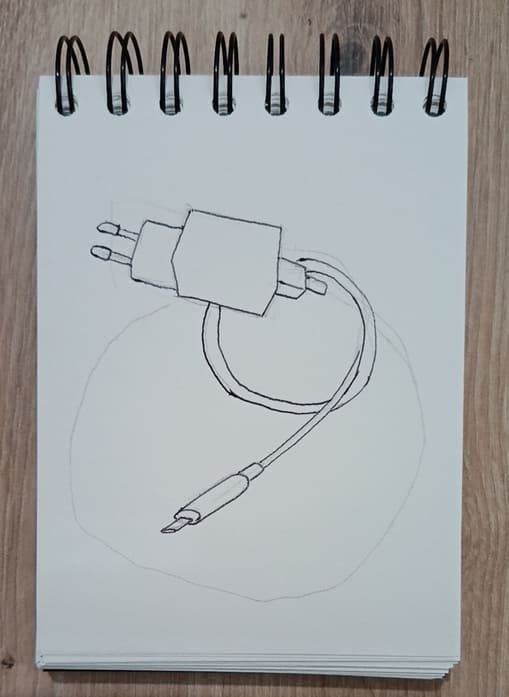
Step 8: Draw the rest of the cable. Trace over the larger circle. Then add the final part of the cable. It connects to the cable part that starts at the connector and goes behind the charger block.
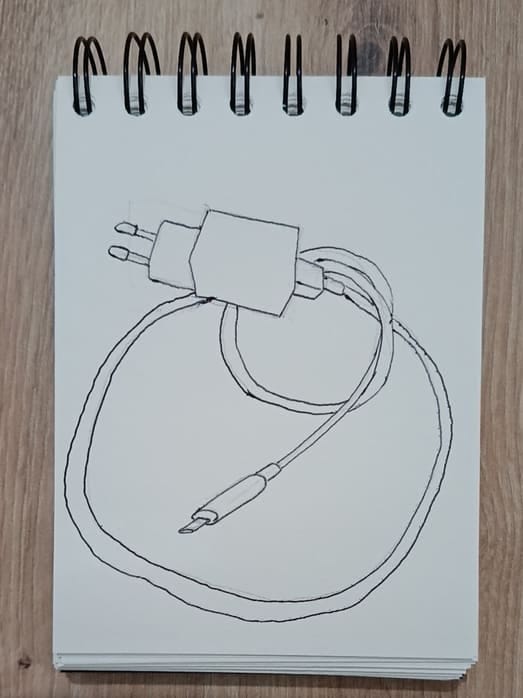
Step 9: For finishing touches, add light horizontal lines on the edges of the rectangles of the charger block and on the tips of the pins.
On the side of the charger block, add wiggly lines to represent the safety, electrical, and product markings. No one knows what they mean anyway, so there is no need to make them too detailed. Mine are just triangles and squares with extra lines and dots. Draw as many as you have space for.
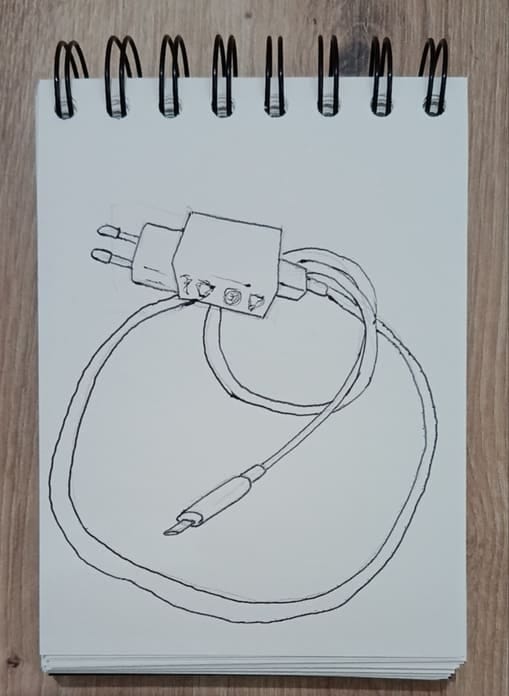
Step 10: Take your pencil and add shadows. Shade the sides of the charger block and the connector.
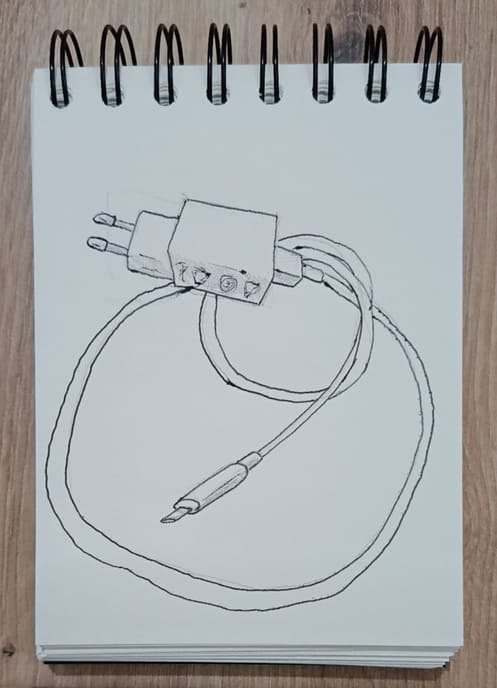
Step 11: The light is coming from the top-left side of the paper, so shade each right and bottom side you find on the cable.
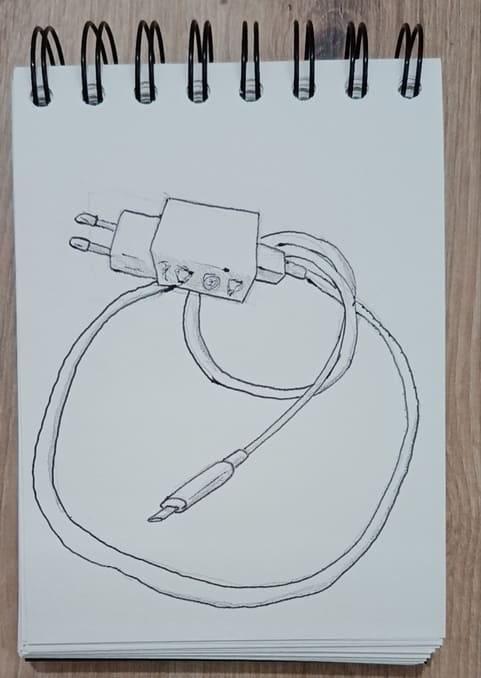
Step 12: Now add the shadows that the charger is casting on the ground. These shadows are very sharp and should be drawn as solid shapes. This is not the type of shadow that gradually disappears.
Add the shadow cast by the charger block. Because of the angle of the light, the shadow does not look like a rectangle. It looks more like a triangle.
Also add the shadow that the largest rectangle casts onto the smaller one on its right.
Then add the shadow of the connector. This one looks like the connector and the part of the cable next to it. Make sure that the cable and its shadow do not touch. That is because the cable is not touching the ground there.
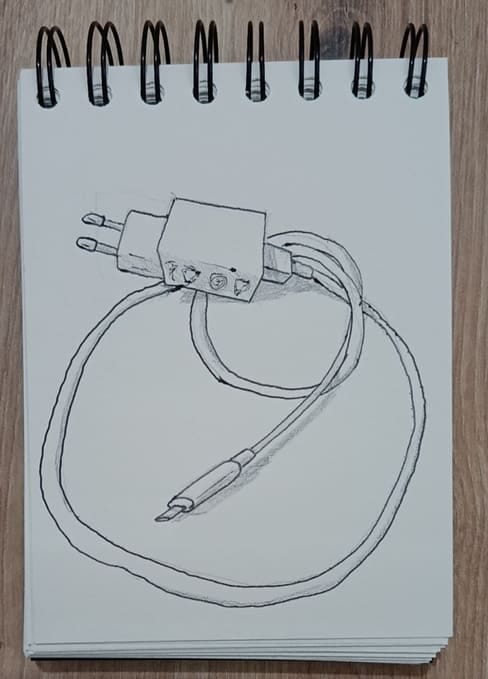
Step 13: Add the rest of the shadows cast by the cable. They are all on the sides where we already drew shadows on the cable.
The cable is very light, so it lifts off the ground in many places. That is why the shadows on the ground mostly do not touch the cable. They only touch in places where the cable is touching the ground.
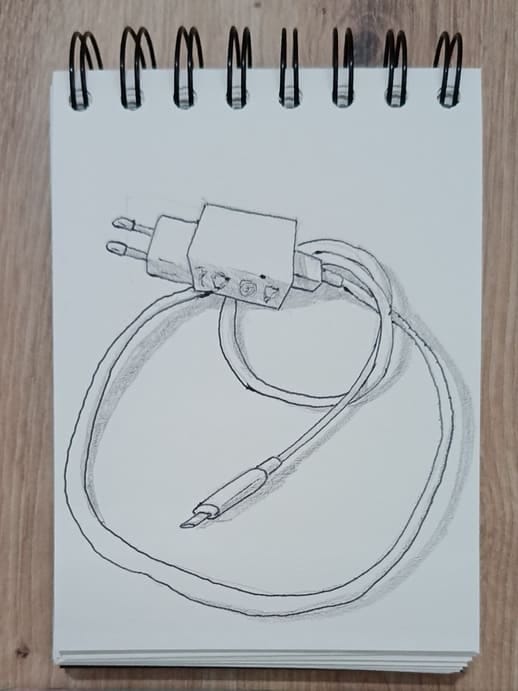
Gentle Tips for Easier Drawing
There are two things I want you to notice in this drawing.
The first is the thickness of the cable. A real cable has the same thickness along its whole length. But that is not the case in my drawing. One reason is perspective. The lower part of the drawing is closest to the viewer, so that part of the cable should look slightly larger. But the main reason is just because I like it that way. I think a perfectly even cable would be a little boring to draw and a little boring to look at. This way, it is thinner here, thicker there, wobbly in the middle. Fun.
The second thing is the shadows. They really do take the drawing to another level. When some shadows touch the cable and others sit slightly away from it, they help explain where the cable rests on the ground and where it lifts a little. Just like the cable, the shadows do not need to be perfect. They can be a little uneven too.
Finding all the little places where a shadow might be was my favorite part of this drawing. What was your favorite part? Let me know, just reply to this email.
I hope to hear from you soon,
Yours in ink and paper