
One Seashell. Lots of Tiny Details.
Learn how to build a complex-looking drawing one simple step at a time.

Difficulty: medium
Materials: pen and pencil
Monthly category: Under The Sea
Inspired by: photo by Elsa Puga

August is already here! So we’re starting a new drawing category. This month, we’re going under the sea. Think tropical fish, coral reefs, crabs, starfish, seaweed, seashells, and jellyfish. As a bonus, this August has five Sundays, so we’ll have an extra drawing to look forward to.
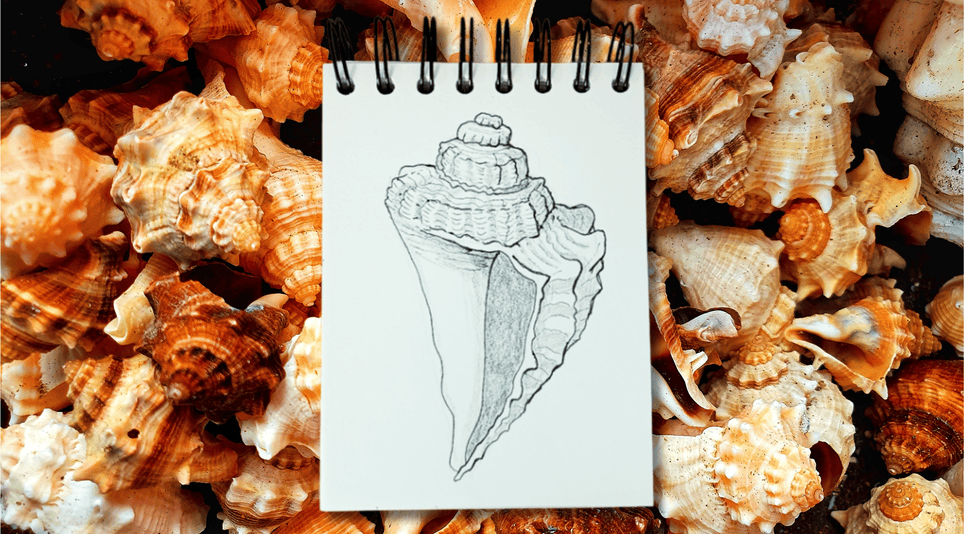
This week we’re drawing a seashell. Its swirly shape, rough and smooth textures, and sharp points are what give this drawing its character.
This is one of those drawings that looks harder than it actually is. We’ll start slow and easy, then add details as we go.
Put on your favorite summer playlist, and let’s draw.
Settle In and Draw
Step 1: Take your pencil, and let's first map out the sketch. Near the top of the page, draw three ellipses for the swirly top of the shell.
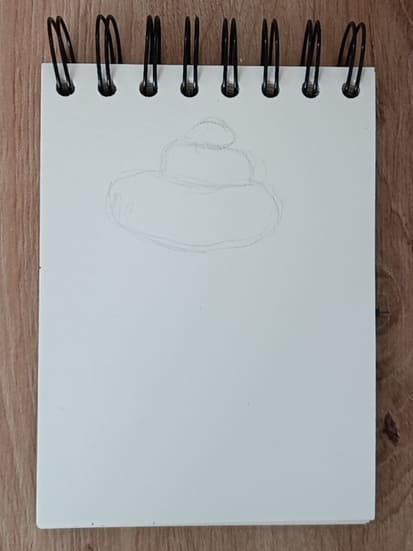
Step 2: Add several vertical lines for the main body of the shell.
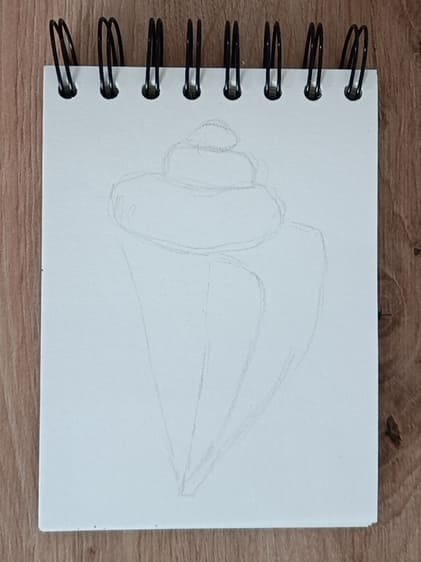
Step 3: Take your pen and trace the lines of the shell's body.
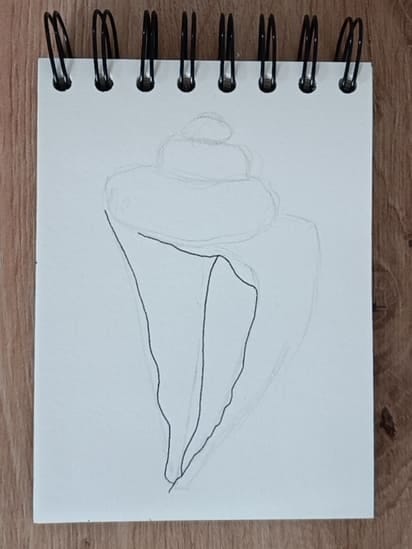
Step 4: Add another line for one of the folds. Let it follow the shape of the shell. This part is very pointy and rough, so make the line wobbly. The top has one large point, while the rest is made of many smaller ones.
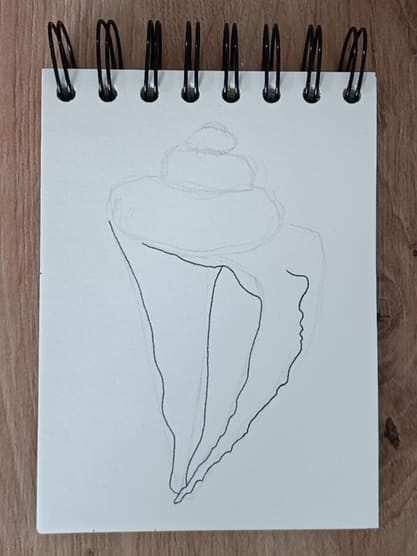
Step 5: Draw the next two points behind the first one.
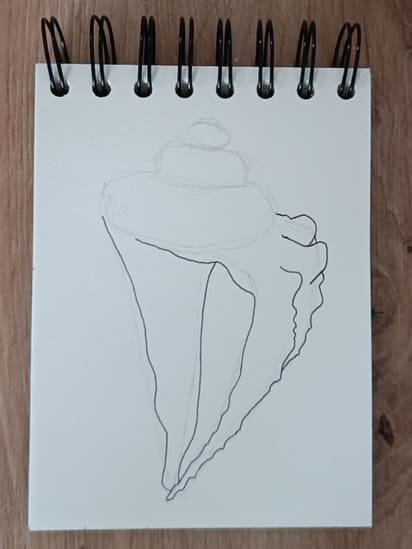
Step 6: Now trace the swirly top of the shell. Make all the lines wobbly. Add two dashed lines across the bottom two ellipses. They mark the change in the surface of the shell.
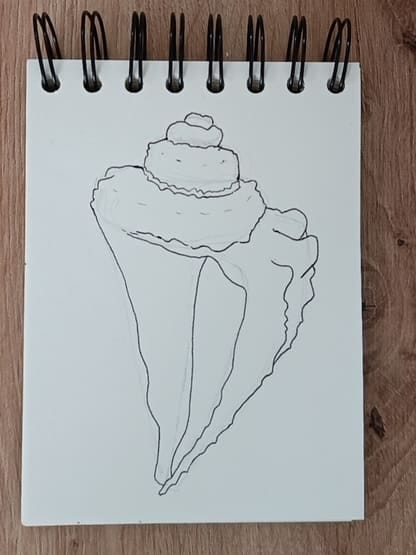
Step 7: Add another vertical line next to the opening of the shell. Make sure to add a small pointed section near the top.
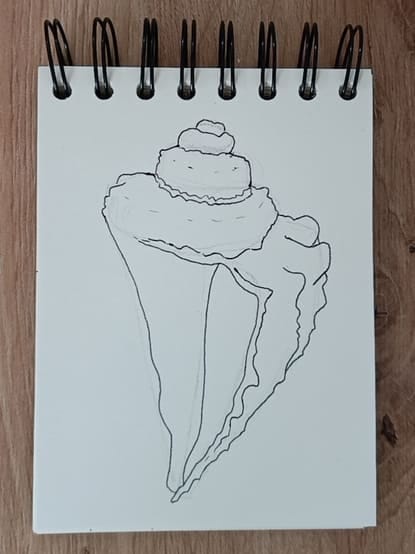
Step 8: Now add some vertical lines to the top part to show its texture. Each wobbly line represents one of the pointed ridges of the shell.
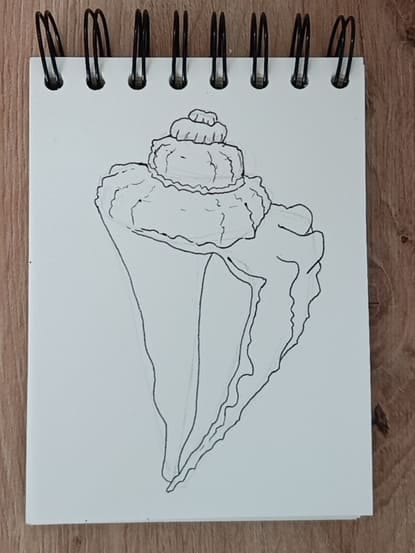
At this point, it is clearly a seashell. You can stop here, add more details or shading on your own, or follow the next steps to make it a little more detailed.
Step 9: Let's add a pattern to the outside of the shell. Draw diagonal wobbly lines above the points. Below them, add slightly curved horizontal lines. Draw all of these lines with a very light touch.
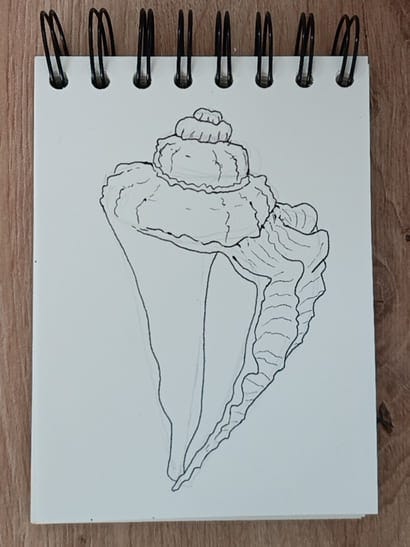
Step 10: Add a few scratch marks to the top of the smooth part of the shell. Keep them short and light.
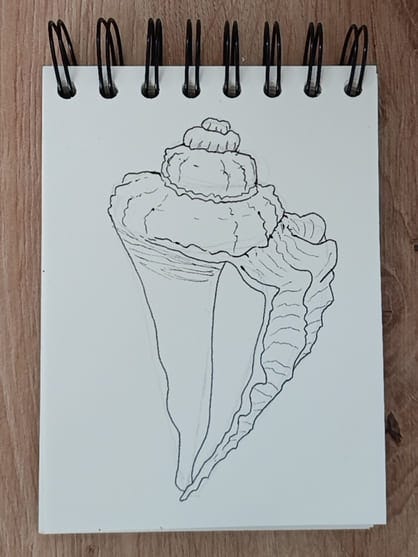
Step 11: Now let's add texture to the top of the shell. Draw columns of little smile-shaped lines around the lines we already added. These lines suggest the raised ridges of the shell. Leave a small gap between each column. Draw them only up to the dashed line, and only on the bottom two ellipses.
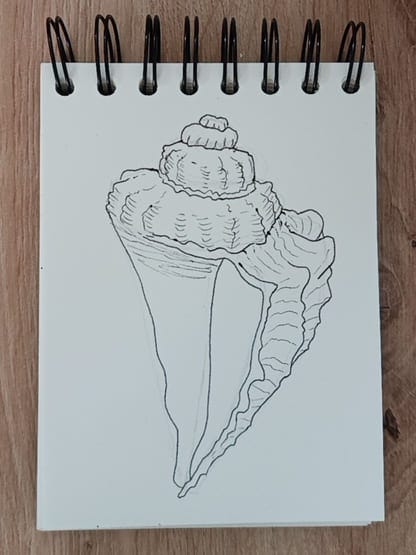
Step 12: Now we'll draw the indented parts of the texture. Add little sad-shaped lines in the gaps between the columns of smile lines. Draw them only on the bottom ellipse.
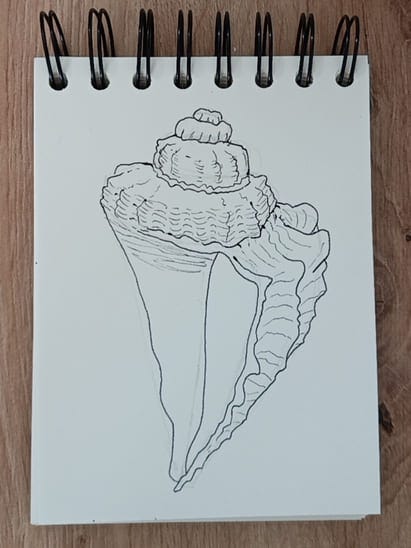
Step 13: The last part of the texture is a few wavy lines. Add them above the dashed lines on all three ellipses.
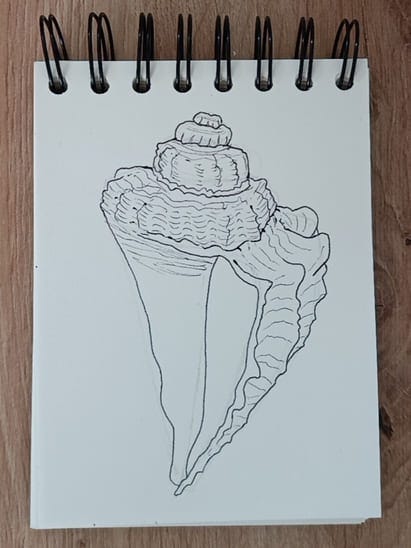
With that, all the pen details are finished. You can stop here or continue with the next steps to add shading and give the drawing more depth.
Step 14: Take your pencil, and let's add the shading. The light comes from the left side of the page, so the right sides of the top section will be in shadow, as well as the right side of the shell's body. Shade the opening of the shell and the edges of the smooth section too. Fill all of these areas with an even tone.
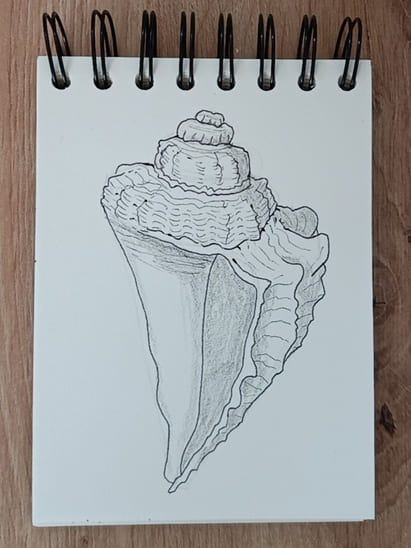
Step 15: Now shade every other texture line on the body of the shell.
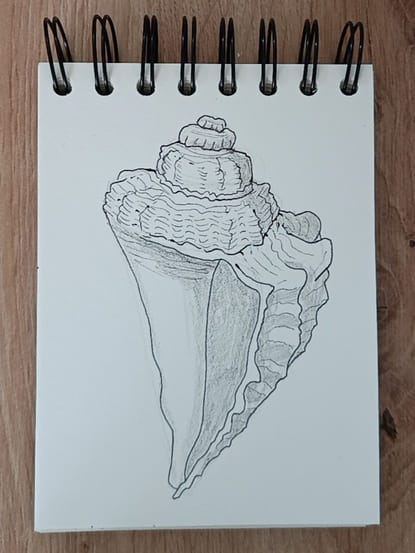
Step 16: On the top part, shade the columns of the sad-shaped lines. Also add shadows to the right of the texture lines on the body, just above the pointed ridges.
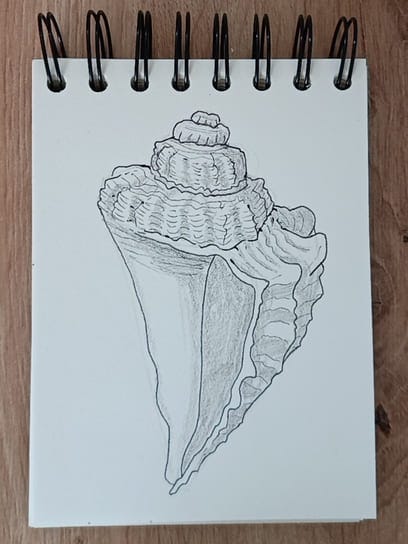
Step 17: Add another layer of darker shading inside the opening of the shell. This will make it look deeper.
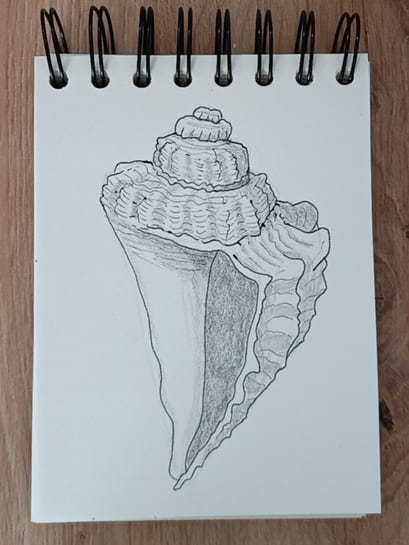
Step 18: For the final touches, take your pen and retrace just a few lines with a bit more pressure. This will make them stand out. Go over all the pointed ridges on the body, the vertical lines on the right side of the top section, and just the upper-right edge of the smooth part. Don't overdo it. Just a few darker lines here and there will make the drawing feel more finished.
Gentle Tips for Easier Drawing
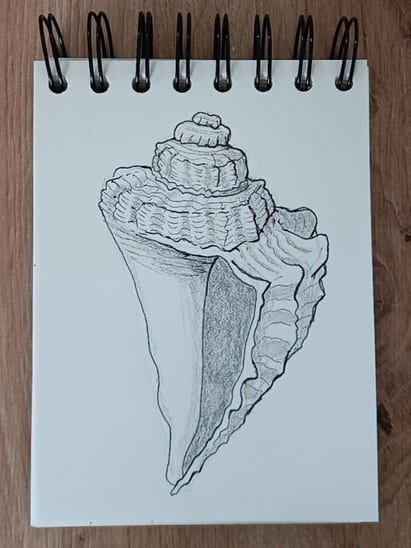
The finished drawing looks intimidating, but if you look at the steps, they are much simpler. This is a great example of building a drawing from the main shapes and gradually adding more and more detail.
Trust the process and just start. I have included two natural stopping points, so you can finish early if it starts to feel like too much. But don’t let the finished drawing scare you away from giving it a try.
As I said, this drawing looks harder than it is. Think of it as one of those drawings you’d love to be able to say, “I drew that.” Give it a try!
I hope you’ll draw this one,
Yours in ink and paper