
Old-Fashioned Camping
A little tent in the woods, a little escape from everyday life

Difficulty: easy
Materials: pen and pencil
Monthly category: Summer Goodies
Inspired by: my wish to go camping and a photo by Araz Yurtseven

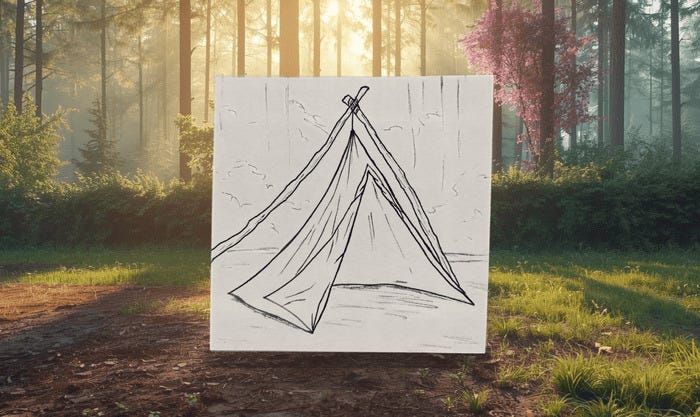
Camping gear has become so advanced lately. Tents can be so luxurious that you would rather stay inside than explore the wilderness outside. But this week, we are going back to basics. A single piece of fabric hanging from a few branches. That is our tent.
If you can, go outside. Find a cozy spot in the shade. Play some forest sounds: birds, running water, wind in the foliage. Open your sketchbook and enjoy.

Settle In and Draw
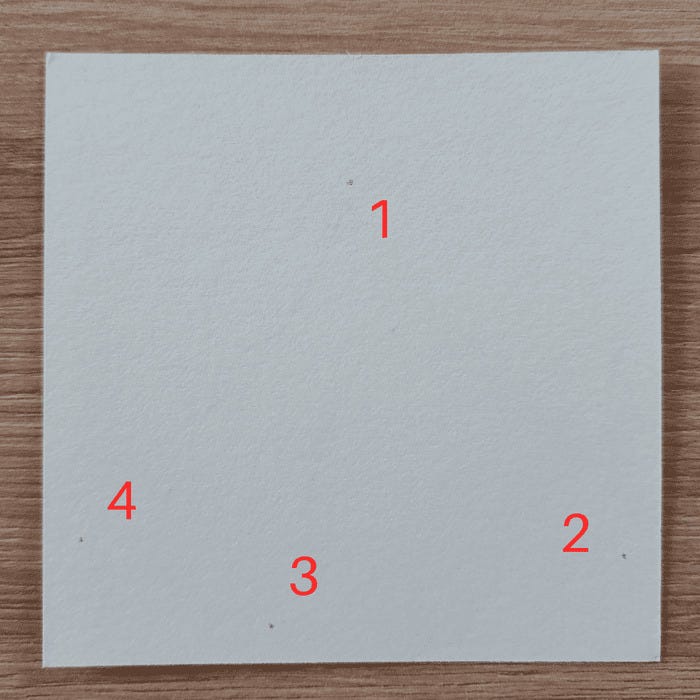
Step 1: First, let’s mark where our tent is going to hang. Usually, that would be clean, flat ground with a nice view. Today, it is four dots placed around the page.
The first dot marks the top of the tent. Place it in the middle of the page, near the top. The second dot marks the right edge of the tent. Place it lower down and close to the edge. The third one is near the center, but a bit to the left. The fourth one is on the left. Make it slightly higher than the second one. The last three dots should be about the same distance from the edge of the paper.
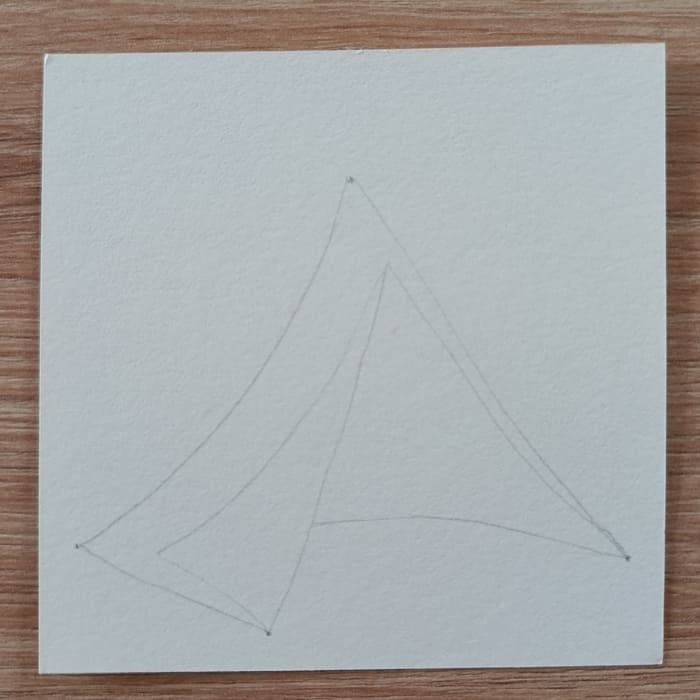
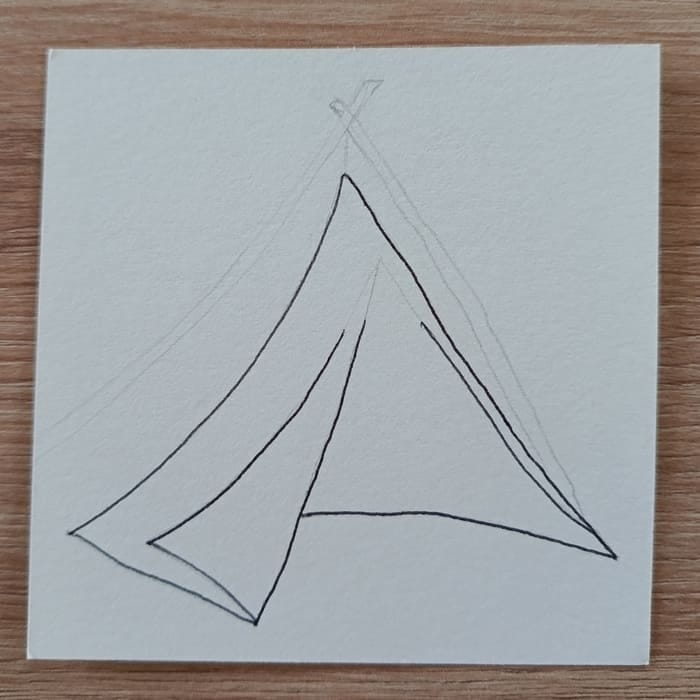
Step 2: Now let’s connect the dots. It is basically two inverted V’s. Make sure that the line connecting dots one and four is not a direct line between the two. It should drop more sharply near the first dot. That is because the fabric of the tent is hanging, and its weight is pulling the line down.

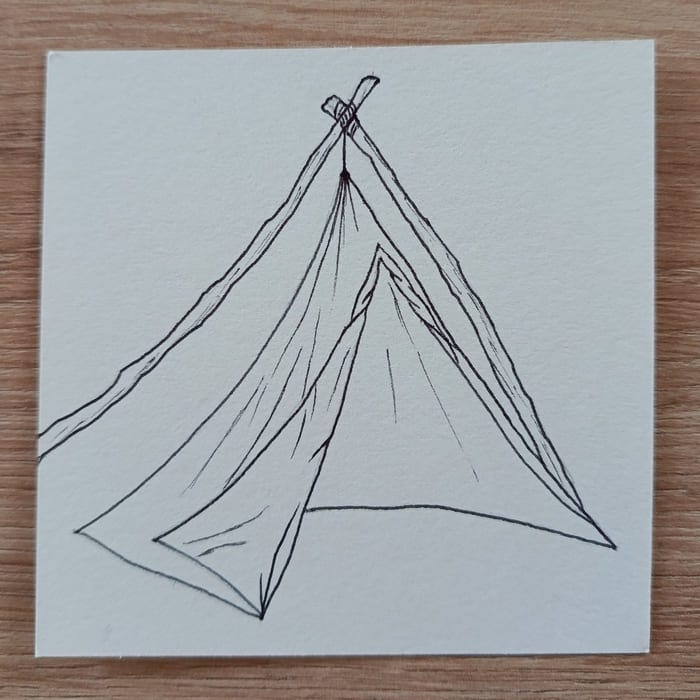
Step 3: Add the fabric lines that mark the open tent entrance. Then add the line marking the place where the tent meets the ground. That line should connect dots two and four. To make it easier, you can connect them all the way and then erase the part that is hidden by the front of the tent.
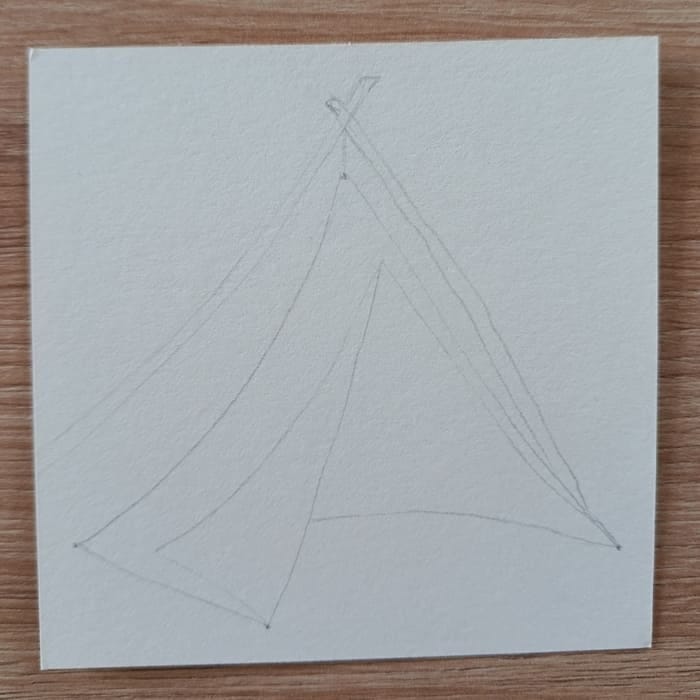
Step 4: Now include the sticks that are holding up the tent. Do not make them too straight. Ideally, the empty space above the sticks should be about the same as the space between the three bottom dots and the edge of the paper. Add the rope line connecting the tent to the sticks. And our sketch is done.
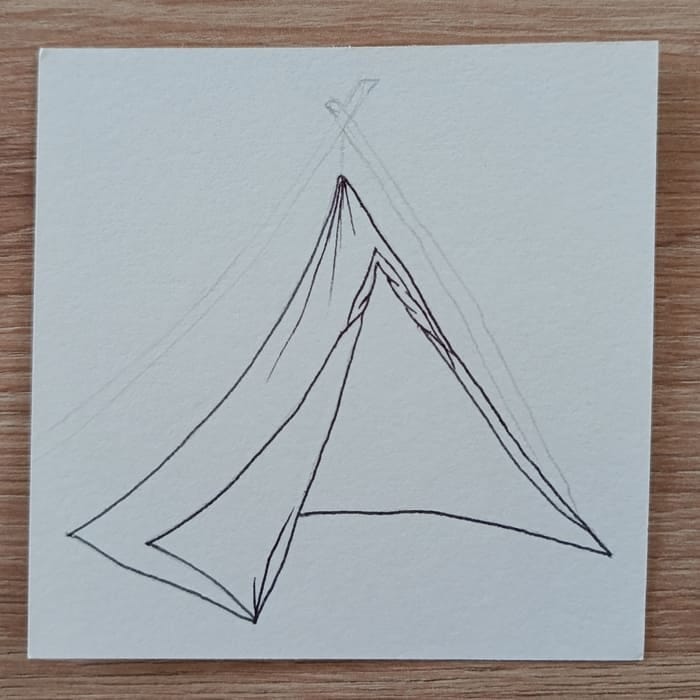
Step 5: Grab your pen and trace the tent. Leave out the lines at the top of the entrance for now.
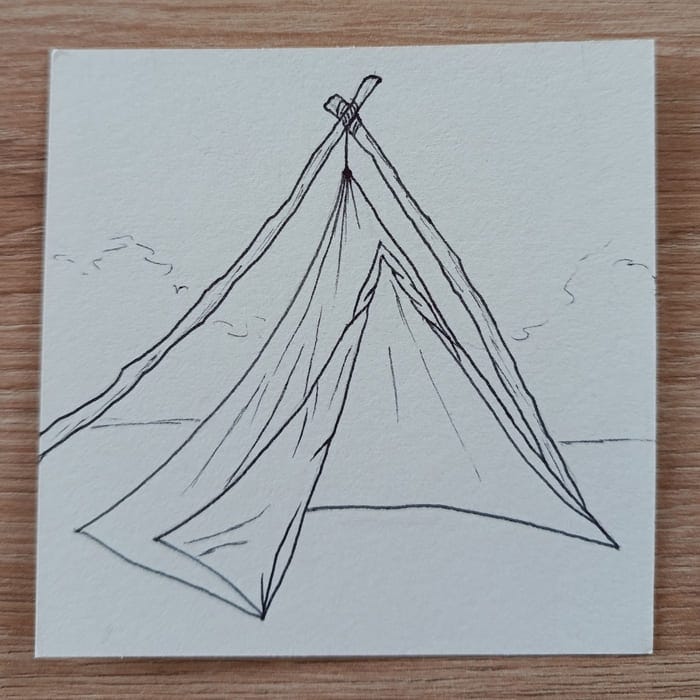
Step 6: The fabric is folded at the top of the entrance. Draw it as shown in the picture, but don’t stress over it. Then add a few lines to represent the folds. Place them near the top and bottom of the tent. Keep these lines lighter and straighter.
Step 7: Add in more folds. Let the lines follow the flow of the fabric. Draw them with less pressure and faster strokes.
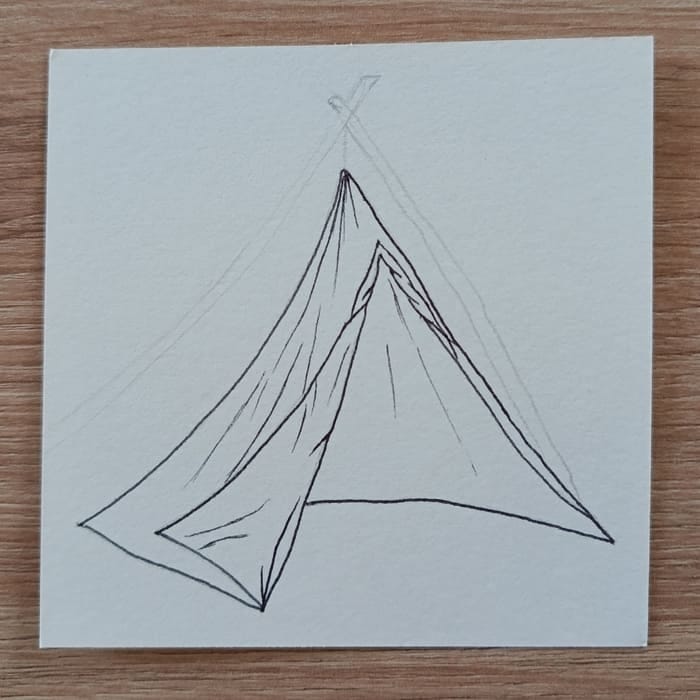
Step 8: Trace the sticks. Decide right away which one is in front and draw that one first. For the sticks, use more pressure and short strokes. Make each line straight, but change the angle slightly. That way, the small lines will not merge into one perfectly straight line.
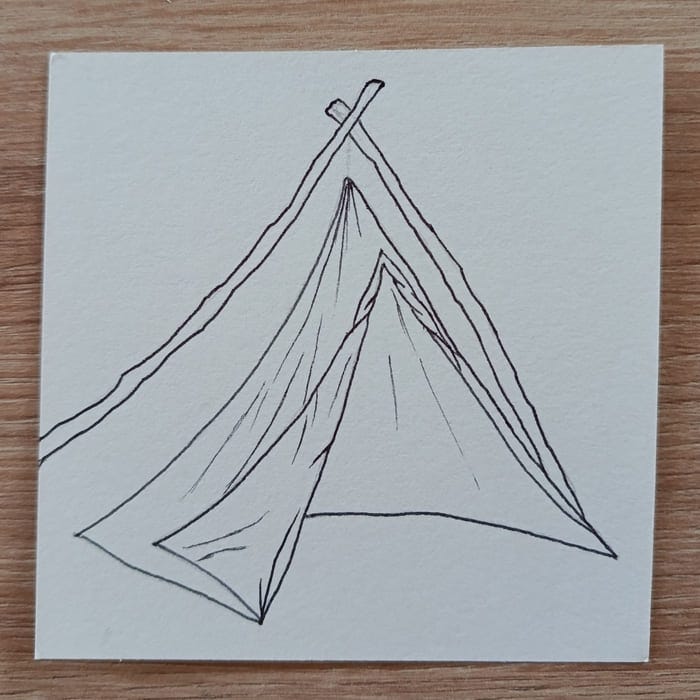
Step 9: Add the rope and tie it to the sticks. Then add texture to the sticks with some very light lines. When drawing them, apply as little pressure as possible. With that, our little tent is done.
Step 10: If you are satisfied with your drawing, you can finish here. A simple tent is enough. But if you feel like staying in the forest a little longer, you can add a background. All the lines from here should be made with very little pressure. Keep your hand relaxed and your lines short. You can also draw the background in pencil if you prefer.
To place the tent in a forest, let’s add a line for the ground. Above that, add some wiggly lines to represent the bushes. Draw them with many short lines that do not touch each other.
Step 11: Draw vertical lines to represent tree trunks. Add more wiggly lines in the bushes. Keep them short and light.
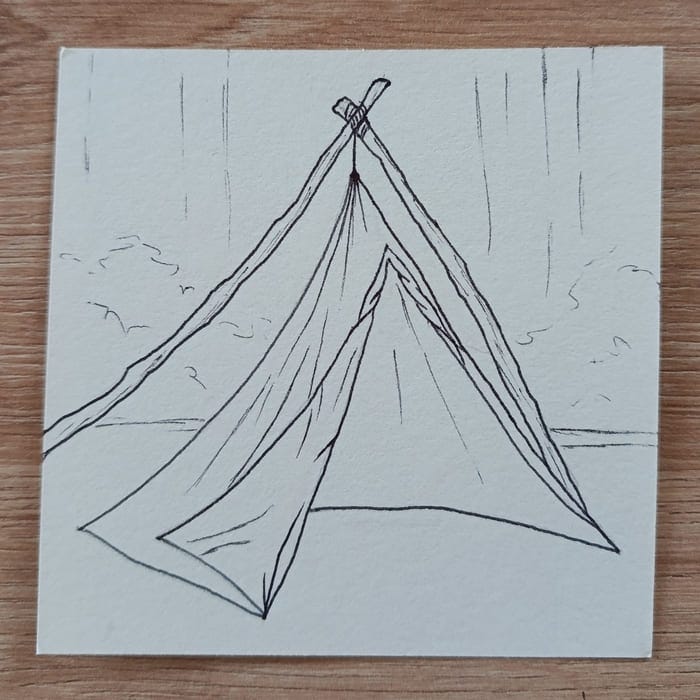
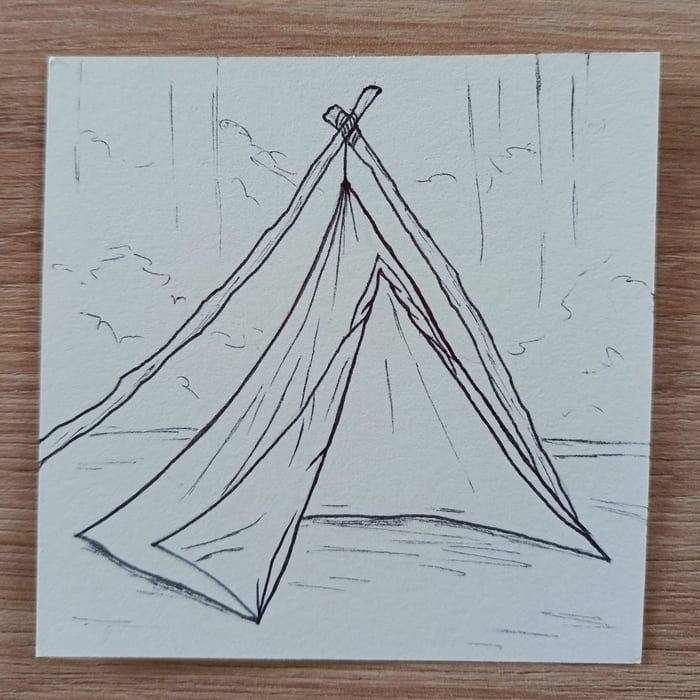
Step 12: Add more wiggly lines near the top. They represent higher bushes or foliage from the trees. Texture the ground with some zigzag lines. Add more of them where the tent touches the ground to create a shadow effect. And you are done!
Gentle Tips for Easier Drawing
This drawing is all about the quality of the lines. They are slow and intentional. Fast and bold. Light and delicate. It is all about using the right type of line in the right place. You can add as much or as little as you like.
I recommend taking an extra piece of paper and placing it next to your main one. Then, whenever you need to draw a new type of line, use that extra paper to practice first. It will help relax your hand and make your lines more confident. Once you are happy with the style of your lines, you can switch to your main paper.
Individual lines are not important here. If one line goes weird, five more will come along and distract from it. So enjoy your lines. That is the most fun part.
This drawing was very relaxing for me. Especially the background. How did it feel for you? Was there a part where you just went into the zone, one line after another?
Reply to this email if you feel like sharing. I would really like to hear from you.
I hope you have a calm day,
Yours in ink and paper