
A Sea Turtle Worth the Details
This week, we are drawing a lovely sea turtle, one tiny wrinkle and shell pattern at a time.

Difficulty: hard
Materials: pen and pencil
Monthly category: Under the Sea
Inspired by: photo by François Balédent

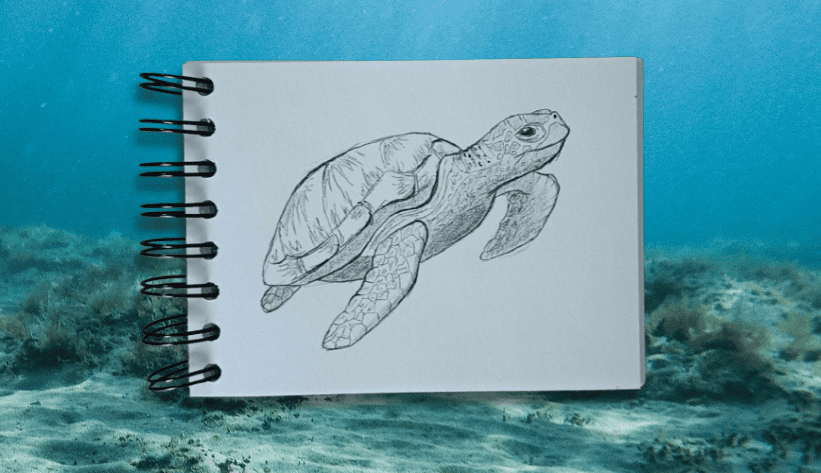
Today, we are drawing a lovely sea turtle. The basic structure — head, shell, and flippers — is simple to draw. The magic is in all the little details that give it character: wrinkles, spots, texture and shell patterns. And that is the most enjoyable part.
This drawing has more steps than usual, but do not let that scare you. We will build it slowly. I also included two stopping points, so you can pause or call the drawing finished before adding all the tiny details.
Play some ocean sounds, find a cool corner, and let’s draw.
Settle In and Draw
Sketch first
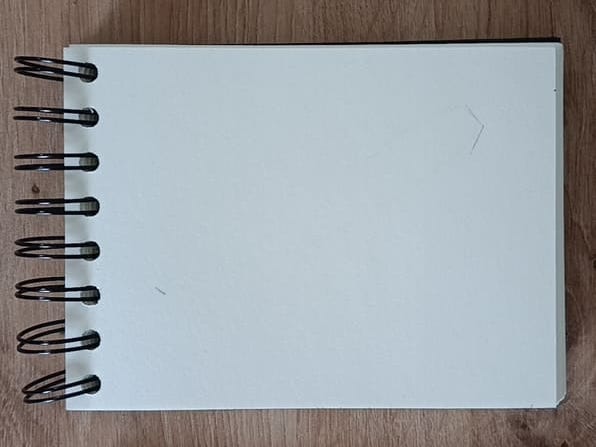
Step 1: To start, let’s mark two edges of the drawing: the head and the end of the shell.
For the head, draw two angled lines. Place them in the top-right corner. No part of the drawing will be higher or more to the right than this part.
Now add a small dash near the bottom-left corner to mark the end of the shell. This will be the leftmost part of the drawing, but not the lowest point. So do not place it too low.
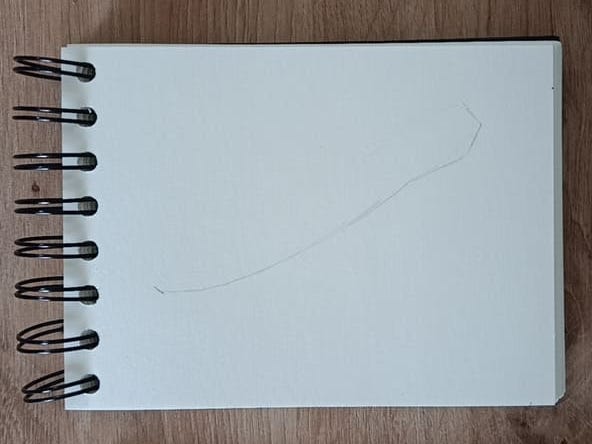
Step 2: Now connect the two marks.
Start from the top with a straight line. That will be the head and neck of the turtle.
Then continue the line, curving it slightly toward the bottom mark. That will be the bottom edge of the body.
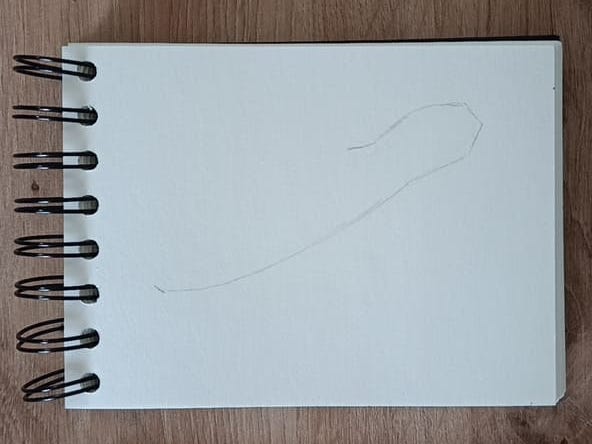
Step 3: Draw the top part of the head and neck. Make sure the neck is not too thin.
Step 4: Add a line for the top of the shell. Connect it to the mark we added at the beginning.
Add another line below the body line for the bottom part of the shell. Draw just the beginning of it.
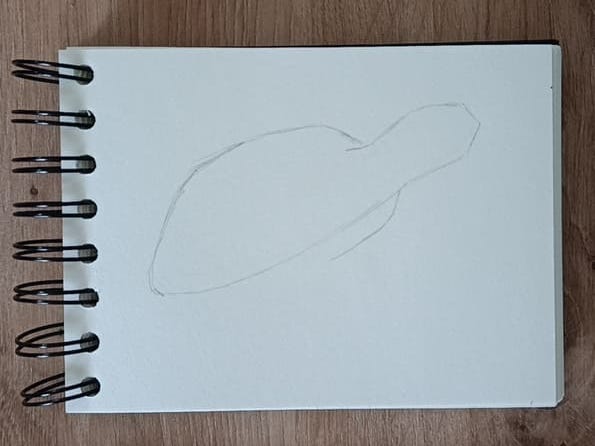
Step 5: Draw the front flipper. Notice that it has a joint, so make sure it bends around the middle.
Finish the bottom part of the shell by connecting it to the body.
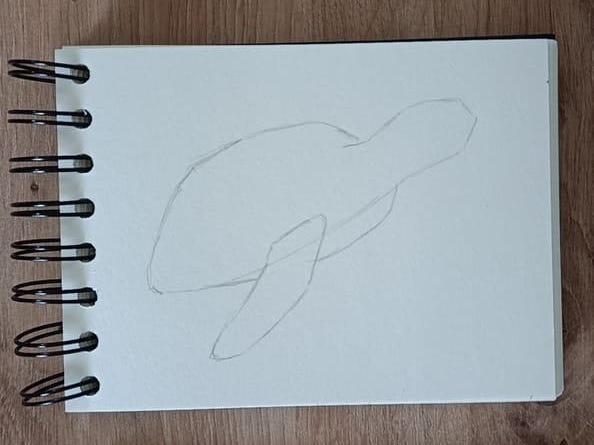
Step 6: Add the second front flipper. This one is more bent, so it does not need to look similar to the other one.
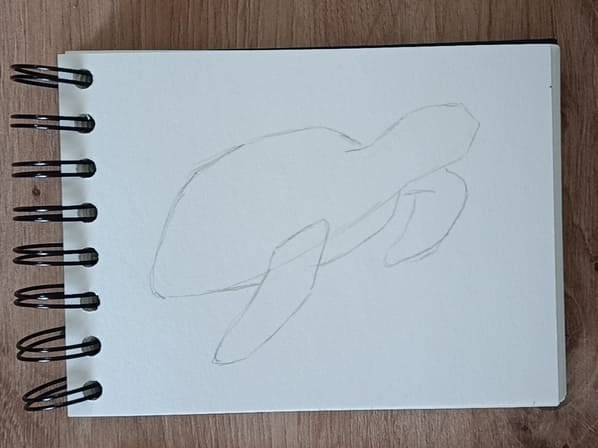
Step 7: Draw a line that separates the body from the shell. Make it slightly curved above the front flipper.
Add the back flipper. This one is much shorter.
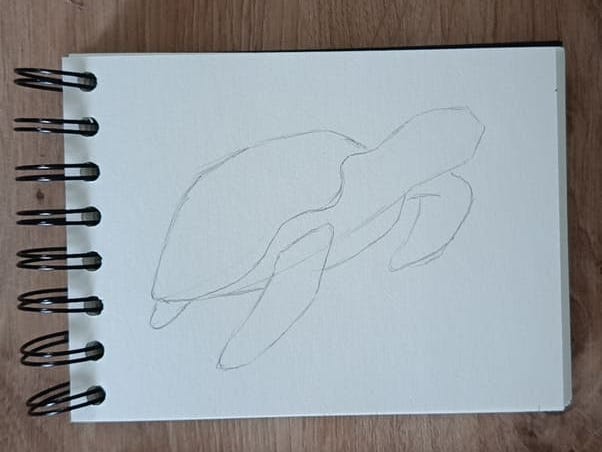
Step 8: To finish the sketch, let’s draw some facial features.
First, add the mouth. It starts at the pointed part of the head, and the end of it is drawn downward.
For the eye, draw one bigger shape for the skin around the eye. Then draw the actual eye in the left corner of it.
And last, draw a small bump at the top of the head for the nose.
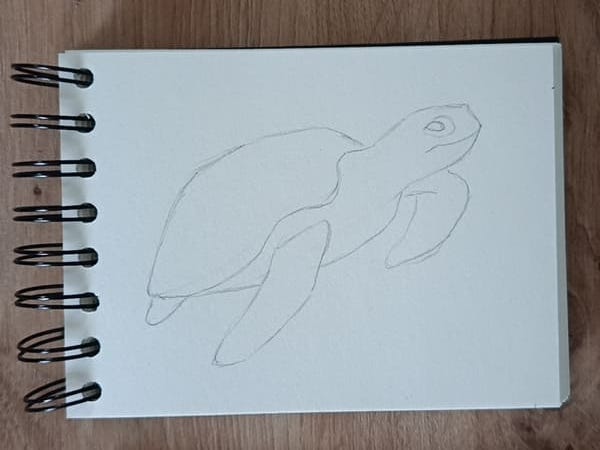
Step 9: The sketch is now finished. Give it a final look. If you find any shapes or angles you don’t like, fix them now.
Once everything looks good, take your pen and trace over the entire sketch. Then you can erase all the pencil marks. Just make sure the pen marks are dry, so the eraser doesn’t create smudges.
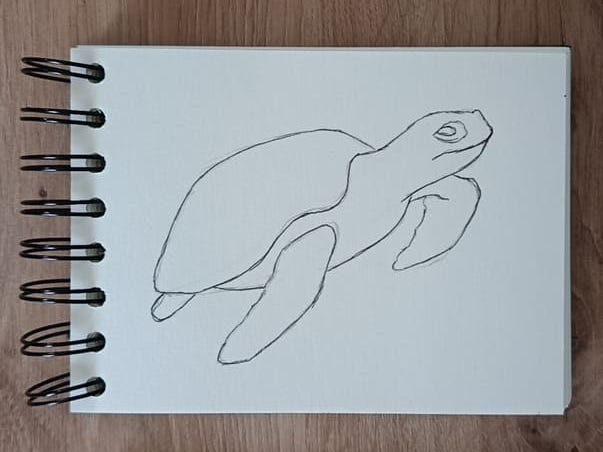
A turtle already appears
Step 10: Now let’s slowly start building details. Draw them with a light touch. If you make a mistake, it is probably best to leave it and move along. Sea turtles have enough details to hide almost anything.
Add two wavy lines near the bottom edge of the shell.
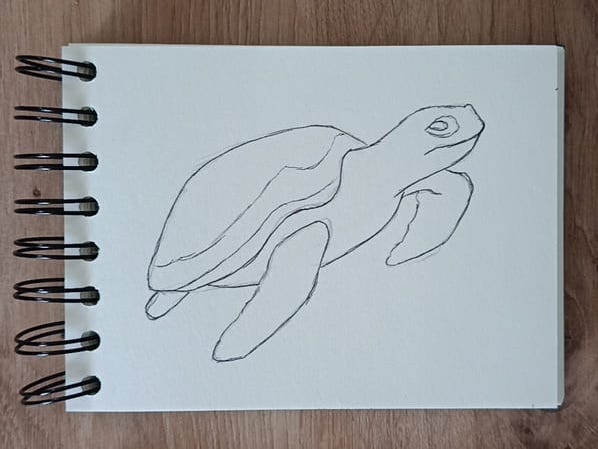
Step 11: Then add vertical lines to create the pattern of the shell.
Add some light lines around the neck, chin, and belly.
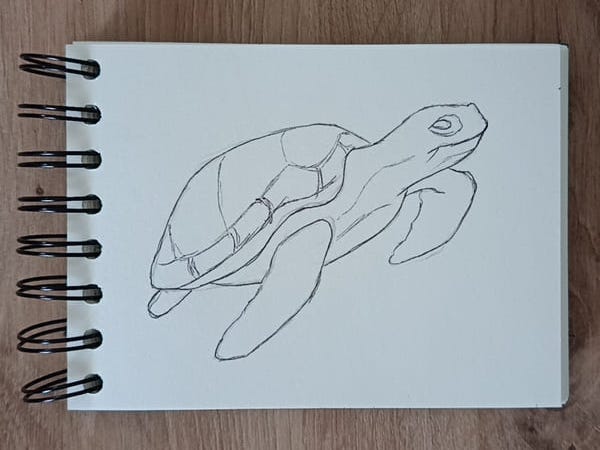
Stopping point 1
With this, we already have a clear drawing of a turtle. In the next steps, we will add different patterns to make it more realistic. But if that looks too hard, you can finish here. In that case, just make sure to color the eye black with a white highlight, so it doesn’t look creepy.
Tiny details, no panic
Step 12: With a light touch, add wrinkles. Place them at the back of the neck and between the shell and the flipper.
Add them around the eye as well, but don’t overdo them.
Add a little half-circle behind the nose for the other eye.
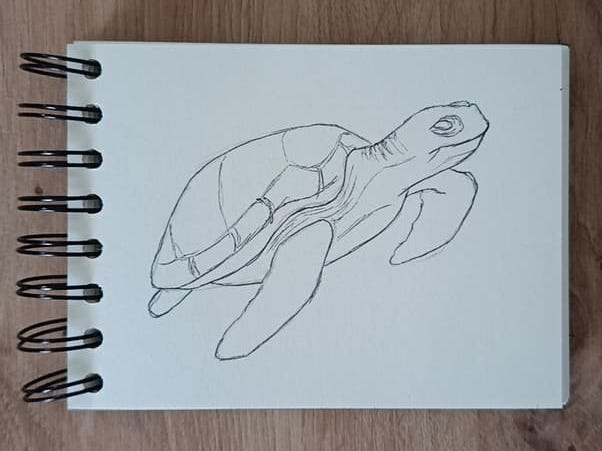
Step 13: Color the eye, but leave one white spot. Add a little dot for the nostril.
Add short lines to the edges of the flippers. Make them slightly curved, so they follow the shape.
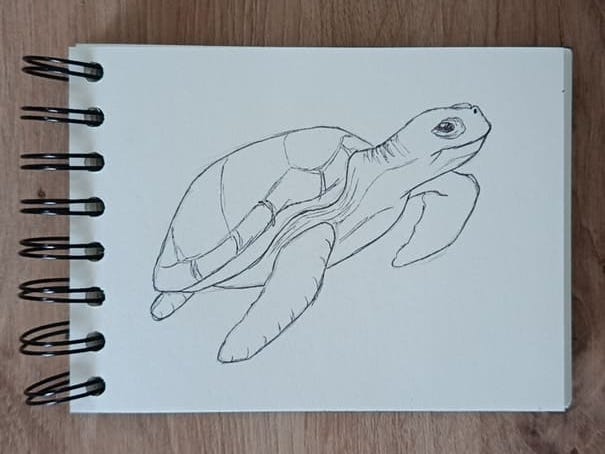
Step 14: To create the patterns on the flippers, add little V-shaped lines between each of those lines.
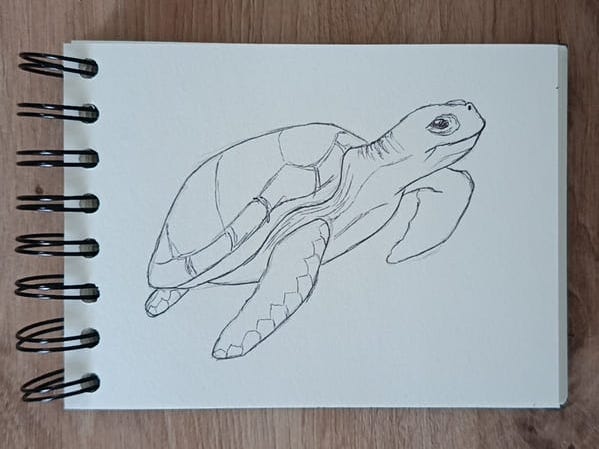
Step 15: Do the same on the other side of the front flipper. This time, instead of V-shaped lines, add slightly curved lines.
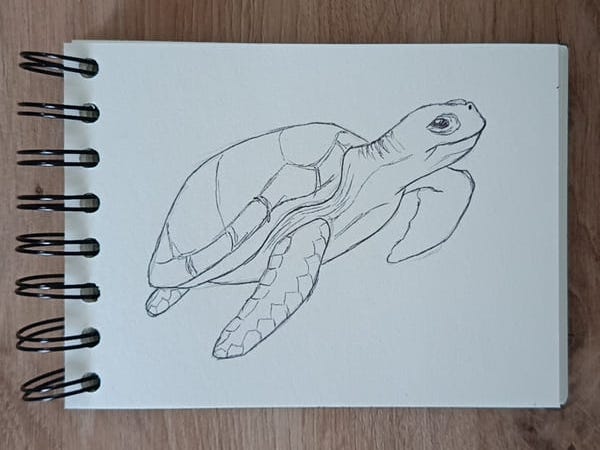
Step 16: To fill in the rest of the pattern, draw a bunch of short lines. Make them form little squares and circles. They should feel random. Make sure they are smaller than the pattern around the edges.
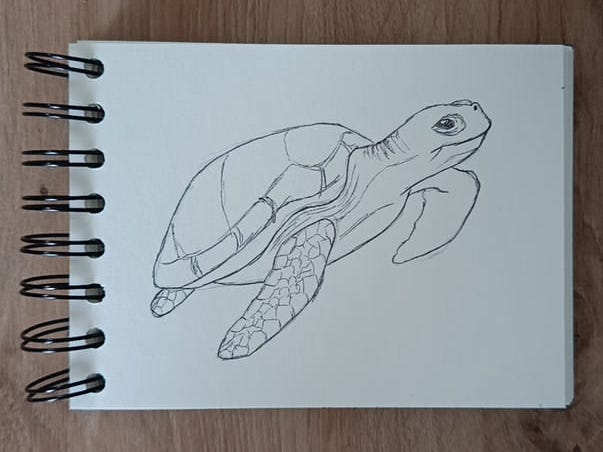
Step 17: In the same way, draw the pattern on the other front flipper. This time, do not fill in the middle all the way. Leave a lot of the little squares unfinished.
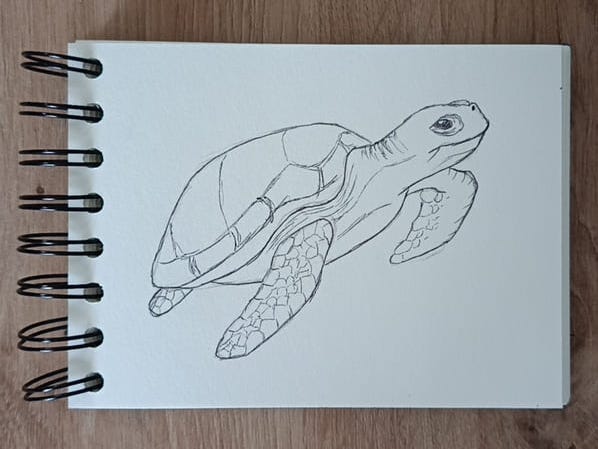
Step 18: Now let’s add the same pattern to the head. Draw the shapes one by one. This time, leave empty space between each spot.
The shapes on top of the head are larger, while the ones below the eye are much smaller.
They do not need to create a perfect pattern with even empty spaces.
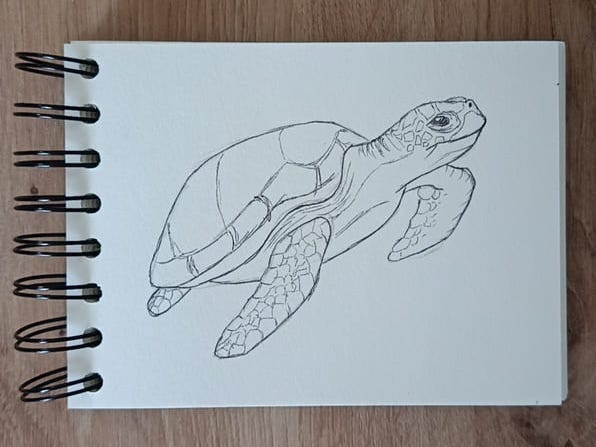
Step 19: Next is the pattern on the bottom side of the neck. This pattern is drawn by making small half-circle lines. Leave a lot of empty spaces. Do not go too close to the mouth.
If there is a lot of empty space, you can add the same pattern to the top side of the neck, just below the wrinkles.
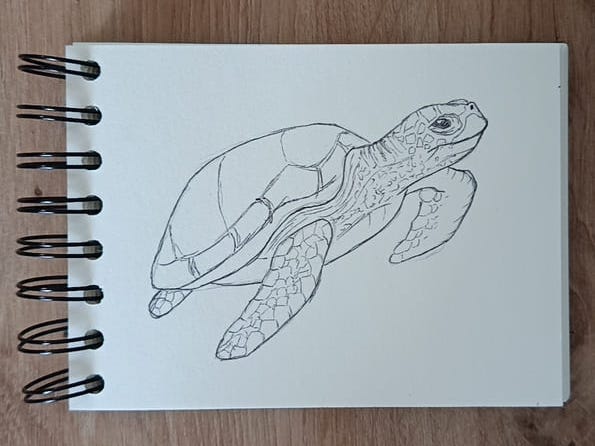
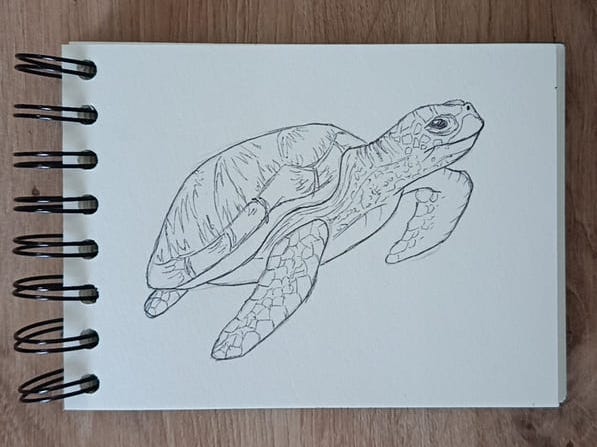
Step 20: The last detail is the pattern on the shell. It is a hard surface, so the patterns are mostly scratches that appeared over time.
To draw them, we will mostly use short, straight lines. Think of them as little bunches of grass. Some are turned sideways, some are upside down, but they are all small groups of lines.
Stopping point 2
We now have all the details in place. If you are tired, you can take a break here or call it done. The next part is mostly shading and coloring.
Shadows and final magic
Step 21: The drawing now has a lot of details and a lot of lines, and they all kind of merge into one another. To make it look more structured, we will add some bold lines.
Trace over the parts of the lines that are used for the shape of the turtle. But don’t make any pattern lines more dominant.
Add little bold dots at the back of the neck for age spots.
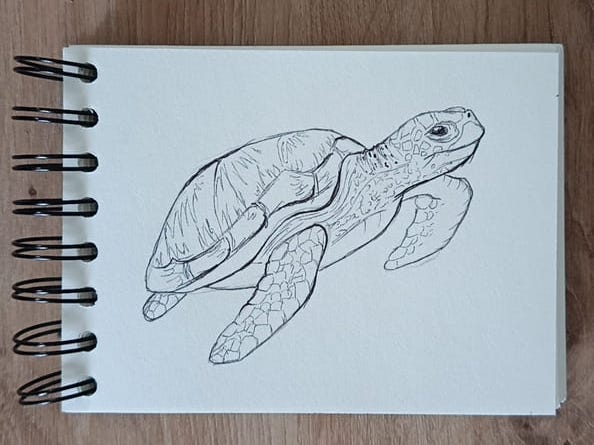
Step 22: Take your pencil and shade the parts that are in shadow. The light is coming from the top, from the surface of the sea. That means the bottom of the neck, belly, bottom of the shell, and parts of the flippers are in shadow.
Shade them in an even tone with a bit more pressure.
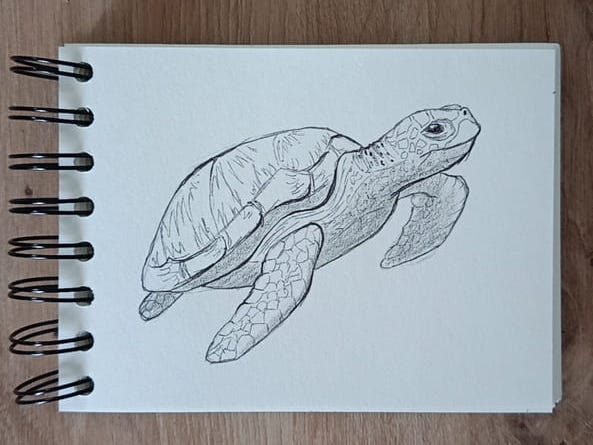
Step 23: Now let’s color the patterns. With a lighter, even tone, color the patterns on top of the head and shell.
You can also color the middle of each pattern shape on the front flipper.
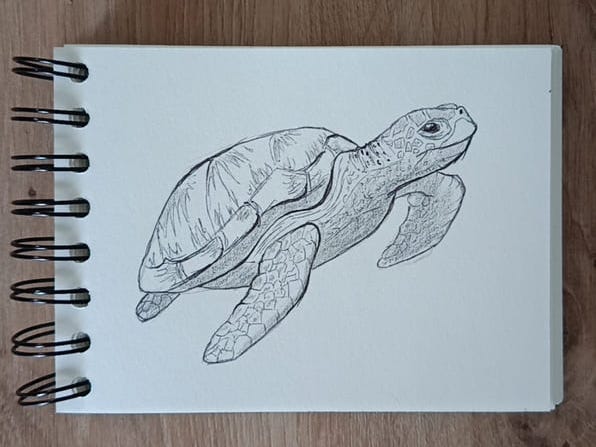
Step 24: To finish, shade the bottom part of the shell even darker.
Gentle Tips for Easier Drawing
If you made it to the end, take a second to look at how much detail you added. This was a big one.
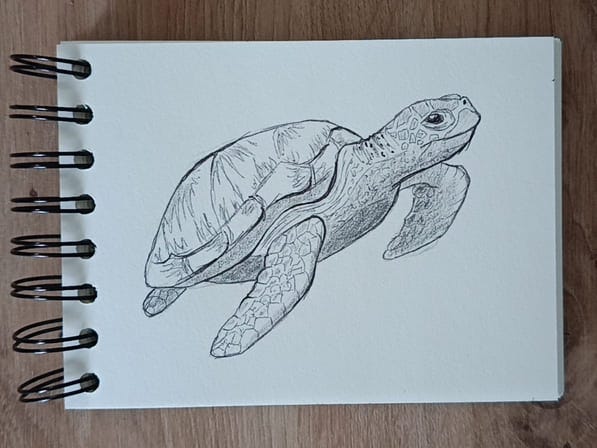
The last piece of advice I have for you is about drawing faces. Drawing facial features is often not easy, but drawing the exact expression you imagined can be even harder. The turtle in the reference looked angry, and I wanted mine to look happy. But when I look at the finished drawing, the turtle looks deep in thought, maybe even a little sad.
So the turtle clearly had other plans. And that is okay. Some drawings choose their own personality, and sometimes it is best to let them.
This is one of those drawings that looks scarier than it is. The good news is that all those little details are easy to draw once you start. So just give it a go. I am sure you will get a few “OMG, did you really draw that?!” reactions.
Here’s to those amazed reactions,
Yours in ink and paper